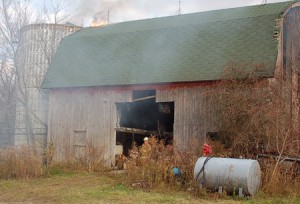
We’ve all seen it in the news or even know someone who had their barn burn down. Thankfully many times without loss of life to human or livestock but sometimes with disastrous consequences. So what should you do to help prevent fires and how to prep should one happen to you?
Planning:
– Fire Department – Get to know your fire department. Stop over and talk with them about what you can do to make your barn fire safe or what you may need to help them do their job better. For much of the information in this post I interviewed a wonderful Rochester Fire Fighter named …. Elvis.
– Space – Your little ½ ton pickup and bumper pull trailer can make it down your driveway and maneuver just fine but can a fire truck? How about multiple fire trucks? Keep in mind they are pretty big so keep driving lanes and turn arounds clear of vehicles and overhead branches.
– Water – Always a problem on farms that have wells. My well tank holds only 100 gallons at a given time and takes about 30 min to refresh. Way too slow to put out a fire. Swimming pools and ponds are a good thing to have within a short distance to your barn should you need them. Another reason for visiting your local fire house is to let them know what your water situation is and to find out if they have pumper trucks or not.
– Smoke Detectors – when the fireman I interviewed mentioned this ,my reply back was “but my animals don’t know what that means and I can’t hear it from the house.” He told me that it’s best to put them in any way. There’s always the potential you can hear it if outside. The animals may even act up at the sound and if you’re like me (watching from the kitchen window) you know when your animals are not in their normal “happy” state even if they are showing only passive signs.
– Fire Extinguishers – Keep one by every entrance to your barn and to the feed room.
- Extinguishers have expiration dates on them. They typically will last just a few years. If your extinguisher has expired replace it. Your old one may still work but you don’t want to find out if it does or not when you need it.
- Dry CO2 Extinguishers can fail due to inactivity. Once a month or so take time to beat your extinguisher. Pound it on the ground or better yet tip it upside-down and beat it with a rubber mallet. This will aggravate the dry contents so they don’t turn into cement on you.
– Halters and Leads – You should have enough halters and leads that fit every single animal in your barn and on your property. Keep them tidy and in easy to find areas. Not only is this good for fires but for any time you may need to evacuate your farm.
– Lightning Rods – Self explanatory
– Emergency numbers – Keep them not only in your barn but also in every single other building on your property. No good having them I the barn if it’s on fire. My friendly interviewed fire fighter also suggests knowing the local number to your fire house not just 911. It could mean getting help to you even faster if calling from a cell phone which is forced to use E911.
– Evacuation Plan – If you manage to get your livestock out the barn where are you going to put them? On my farm animals all have free access to the barn and are never locked in. Should the barn catch fire I can easily herd animals away from the barn and into the fields keeping them 100ft away from the barn.
Prevention: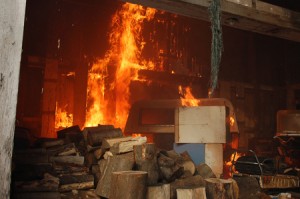
– Clean barn – Keep your barn free of cobwebs and loose hay or straw. Dust buildup on electrical outlets could cause shorts too. We all know rodents will eat through electrical wire so keep a cat around to keep those pests out too. Keep weeds and brush away from yoru barn. Round-up or string trim everything back.
– Hay storage – ideally you’ll want to store your hay in another building NOT attached to your livestock area. However, in WNY many barns have lofts so keep these tips in mind:
- Most hay fires occur within 6 weeks of bailing. For the first few months of having new hay in your barn check it daily to see if there is any suspicious heat coming from them. You will know a bad bale when you feel it. It will be extremely hot to the touch and steam will come out of it if you cut the bale open. Use caution and don’t burn yourself when removing bad bales.
- Air flow – It drives me crazy to see hay lofts shut up tight. Hay needs to breath… keep the loft doors open. When stacking hay do NOT stack it right up against the wall. Instead leave it 2-3 feet away from the wall so that air can move around the bales. Also, stack the bales up on pallets so air can flow underneath. More airflow = dry hay which will be less likely to ignite on its own.
- Clean your hay storage area at the end of every season. Sweep out old hay and dirt before you put the next year’s hay in.
– Bedding storage – bedding can burn just as easily as hay… Hello wood pellet stoves! Keep only enough bedding in the barn to do that day’s chores. If you need an extra out-building to store extra bedding/hay/feed pick up a Garage-in-a-box at Tractor Supply. $250 for a 12x8x20 holds a lot of stuff and will keep it away from your livestock.
– Mulch – I would have never of thought of this. Elvis told me a story about how last year he had to put out a fire because the landscape mulch spontaneously combusted. I guess I’ll be decorating with rocks from now on.
– Electrical – In an old barn or even a new one there are a lot of electrical issues that can occur.
- Cleaning – we already covered this but keep your barn clean!
- Extension cords – They are meant for one time uses not semi-permanent or permanent solutions. If you find an area where you are constantly running an extension cord for a heated bucket or light then spend the time and $ to put a proper outlet there.
- Plug Strips – Same goes for plugging multiple things into 1 outlet. It is nice to have a plug strip but plugging too many things into 1 outlet can overload the wire which in turn heats up, catches a cobweb or hay on fire and poof, your place goes up like a match stick again.
- Appliances – When possible unplug your appliances such as radios or coffee pots. If using heated buckets, fans or portable heaters check them frequently. Don’t let dust build up on fan blades or dirt get worked into the plug of your water bucket.


