🌾 Welcome to Dutch Hollow Acres – Your Digital Farmstead! 🌾
Join us where the pastures are virtual but the advice is as real as it gets. Every week, we dive into the authentic world of small-scale farming, bringing you hands-on advice, heartwarming stories, and a behind-the-scenes look at life with our lovable livestock.
🐔 What’s New This Week? In today’s episode, we’re giving you the insider tips on livestock care that can only come from daily life among the animals. We’re talking health, happiness, and the hustle that turns a hobby farm into a thriving homestead.
💡 Farm-Fresh Advice “Click, listen, and let the countryside connect with your device. Ready for today’s farm-fresh advice? Let’s jump in!” We’re here to make sure you’re equipped with everything you need to know to make your farm flourish.
👨🌾 Connect with Us Don’t forget to subscribe and hit that bell icon so you won’t miss out on any of our episodes. Share your thoughts and questions in the comments below—we love hearing from our fellow farm enthusiasts!
📱 Follow Our Journey Get more Dutch Hollow Acres: Instagram: @DutchHollowAcres Twitter: @DutchHollowAcres Facebook: Dutch Hollow Acres
📧 Contact Us For collaborations and inquiries, reach out to us at: shop@dutchhollowacres.com T
hank you for being a part of our online family. We can’t wait to share more of our farming journey with you!
Facebook as a fun way of letting you see your memories of years past. Sometimes that’s fun and sometimes it bring up things you’d rather forget. Case in point, a 40 year old Paso Fino who got frostbite! Since this is not something that happens frequently in horses I thought I’d share our experience with this odd event.
Year: Feb 2015 Horse: Habanero Age: 40yrs old Breed: Paso Fino Sex: Gelding Temp: -36F with the wind
Like most folks who care for livestock I live and breathe weather reports. That night was no exception. I was very well aware how cold it was going to get and prepared the barn with extra deep bedding, brought in mares and foals and made sure very one had access to a wind free shelter, heated water and as much hay as they could possibly want to eat.
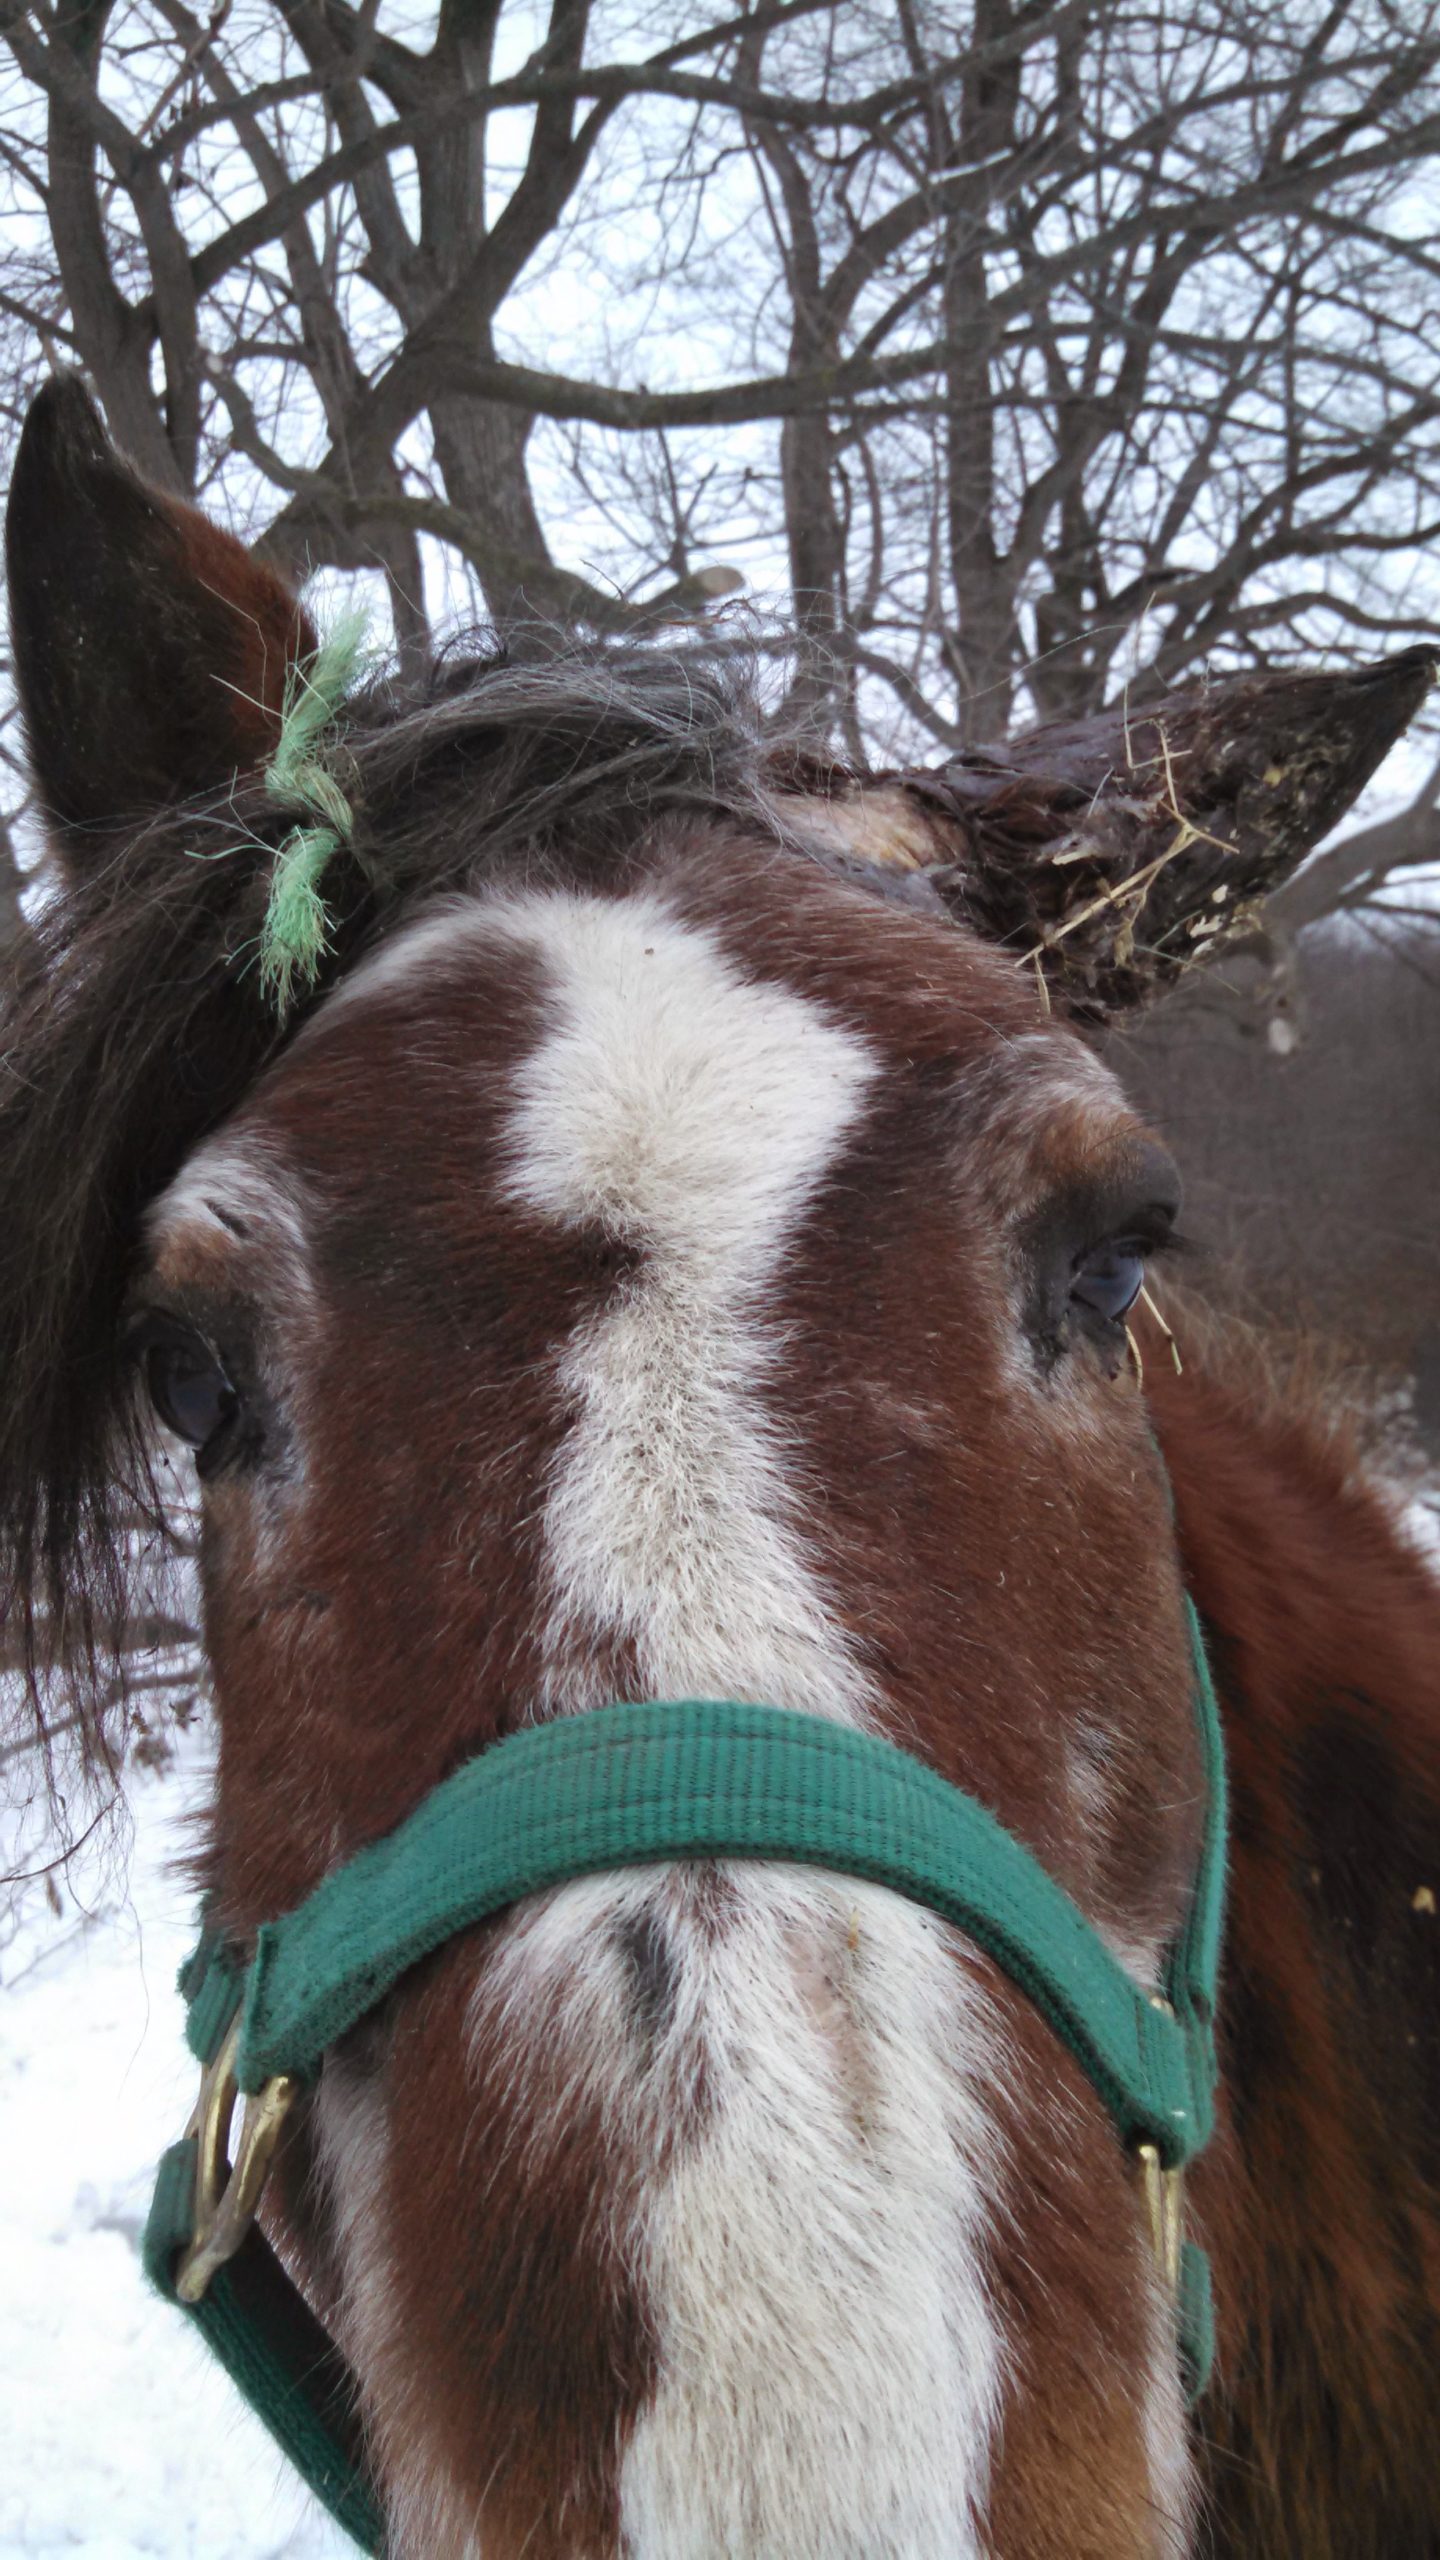
8pm I did night check before turning in for the evening. I remember having to walk the old man back into the shelter since he loved being outside. I left when he was happily munching on a hay net. The next morning I came out to find he had severe frost bite on his left ear.
Photo of ear I sent to my vet.
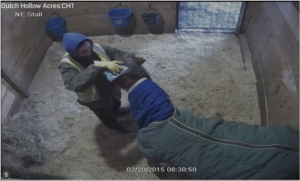
My poor vet asked me a bazillion questions. The best answer I had was yes, I feel heat in the ear tip. Which was a good thing since that meant we still had blood flow! Irony, despite the -30F temps a swelled up ear meant we had to bring the inflammation down with a cold pack! Thanks to barn cameras you get a view of this process. Pony layered up in 4 blankets because he was hypothermic and me holding an icepack to his ear.
Applying a cold compress to a swelled up frostbit ear in -30F temps
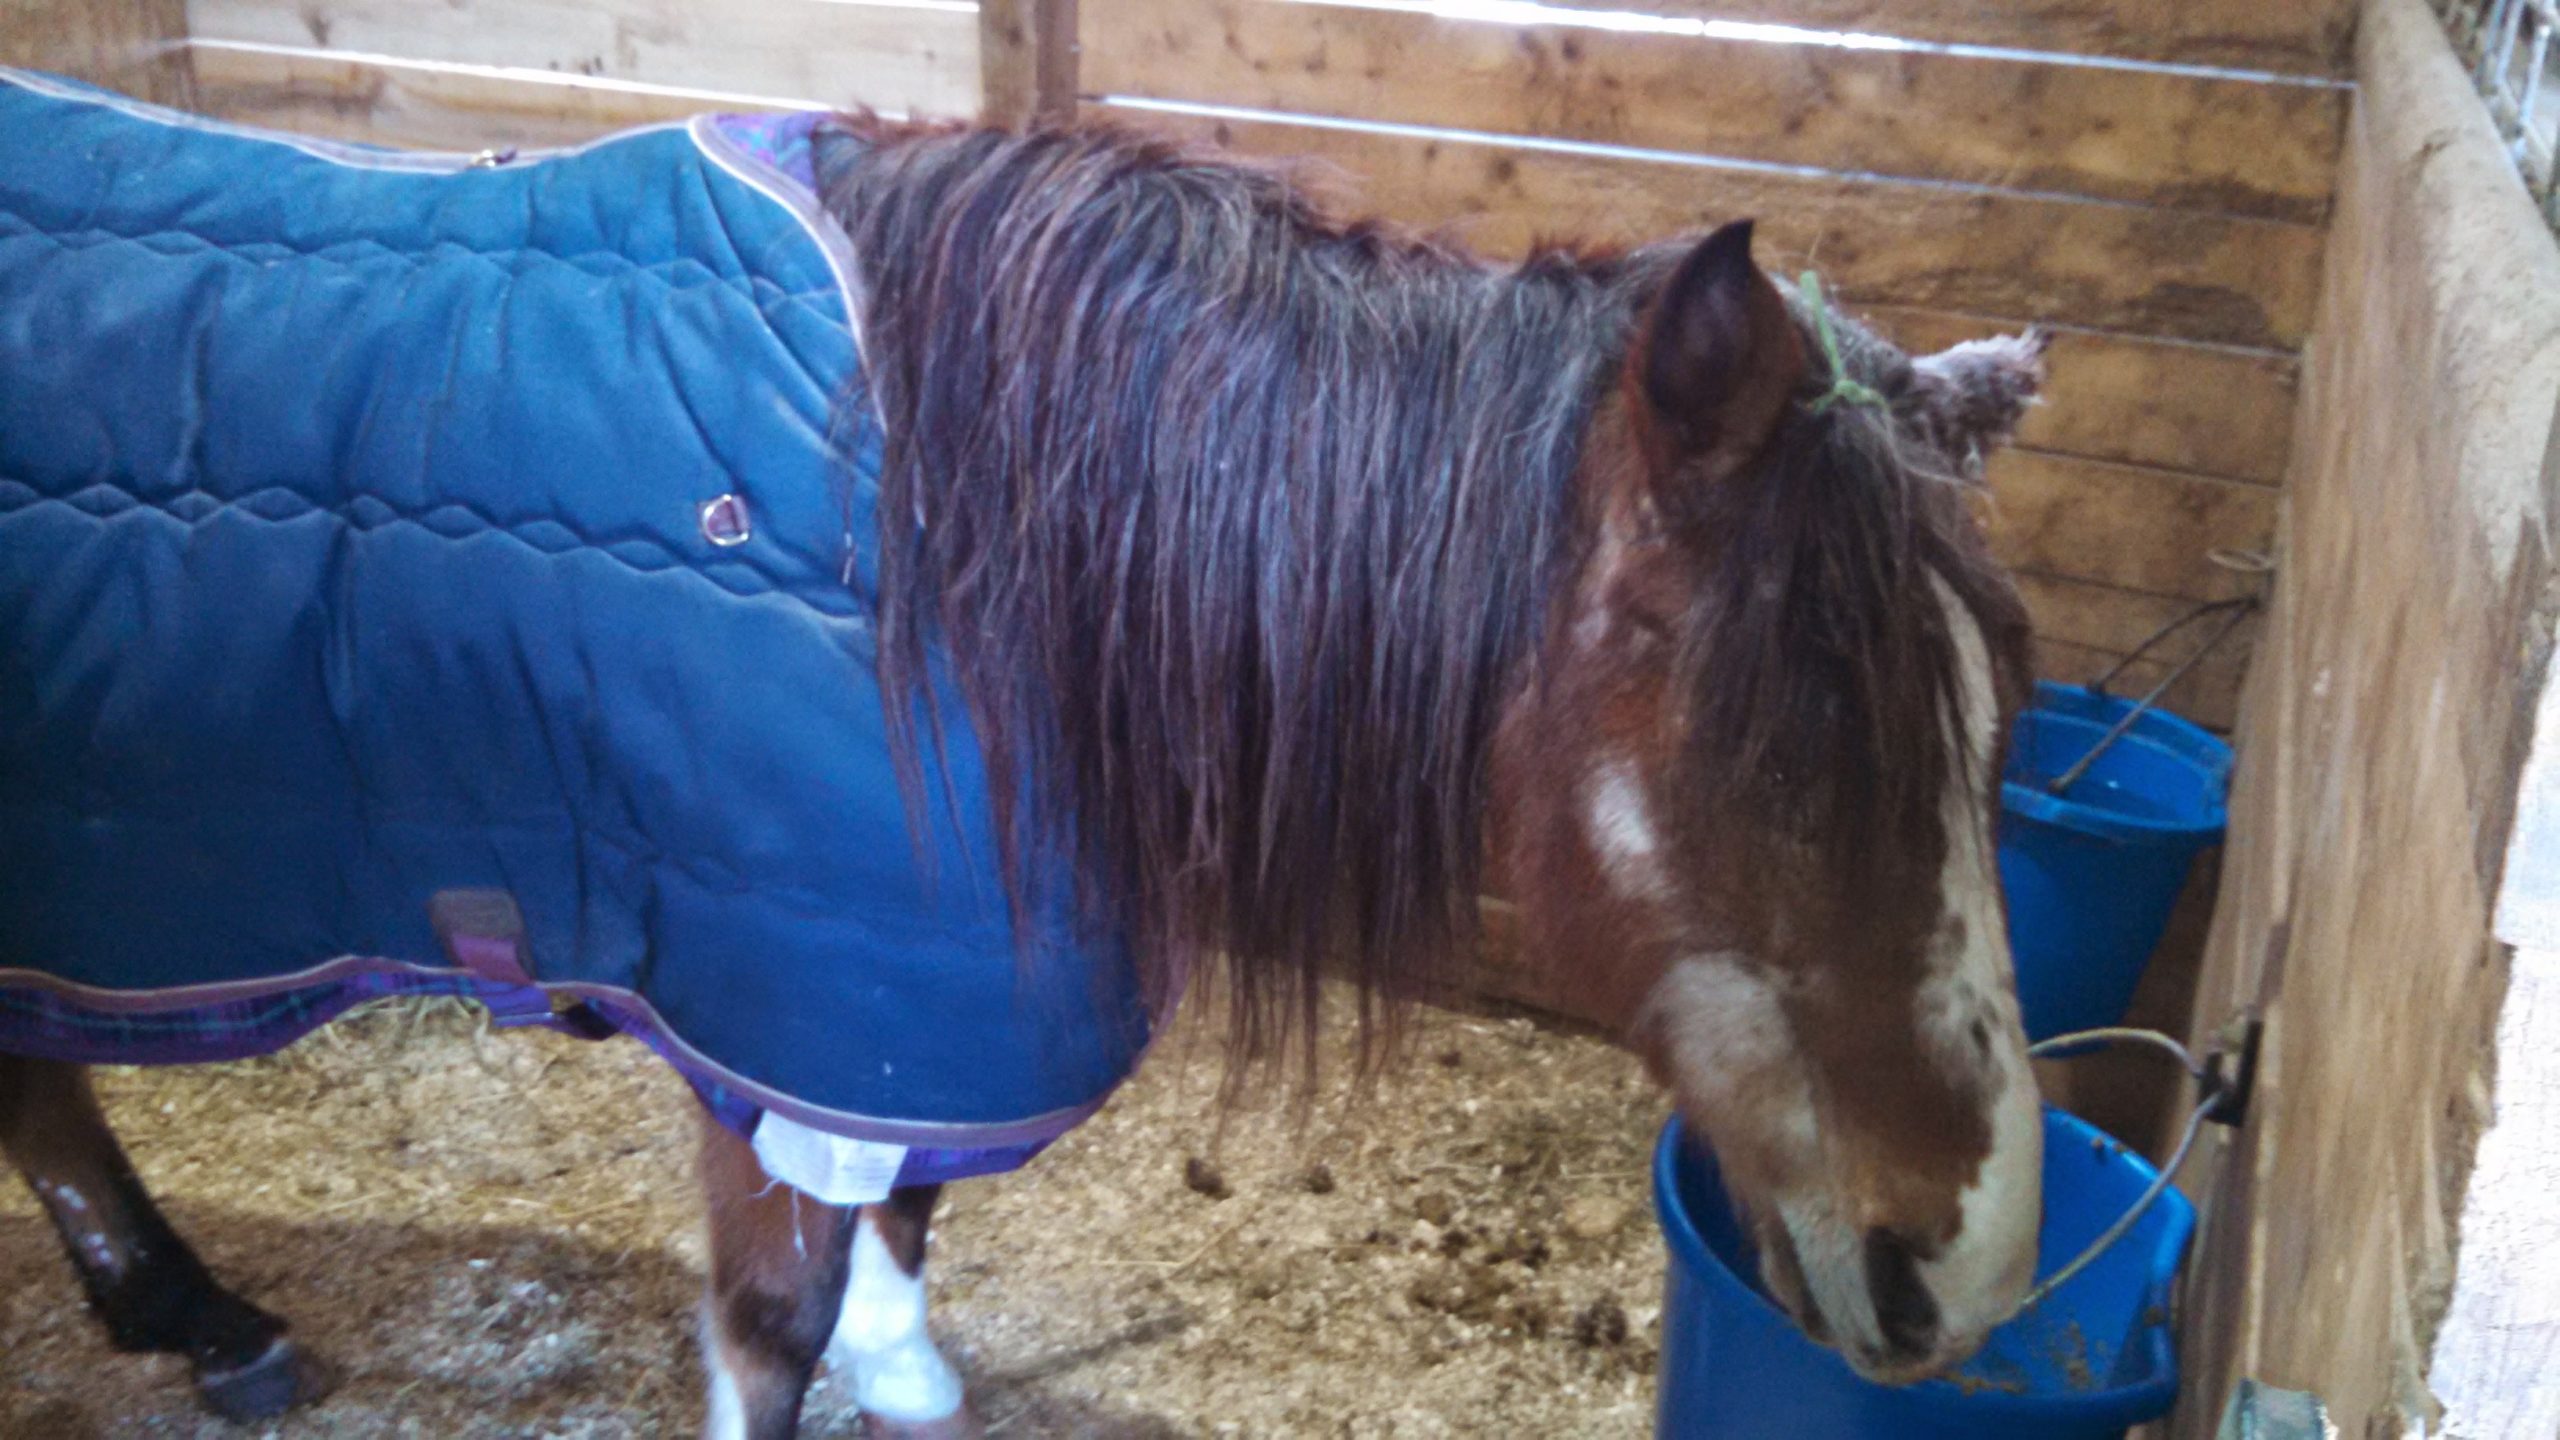
Once the swelling was under control the next step was to prevent the frostbite from getting worse. How do you do that? Petroleum jelly of course and lots of it. What a sweet boy he was putting up with all this attention on an ear that I’m sure hurt a lot.
A well lubricated Habanero. “Seal in the heat”
Warming up and wanting to eat.
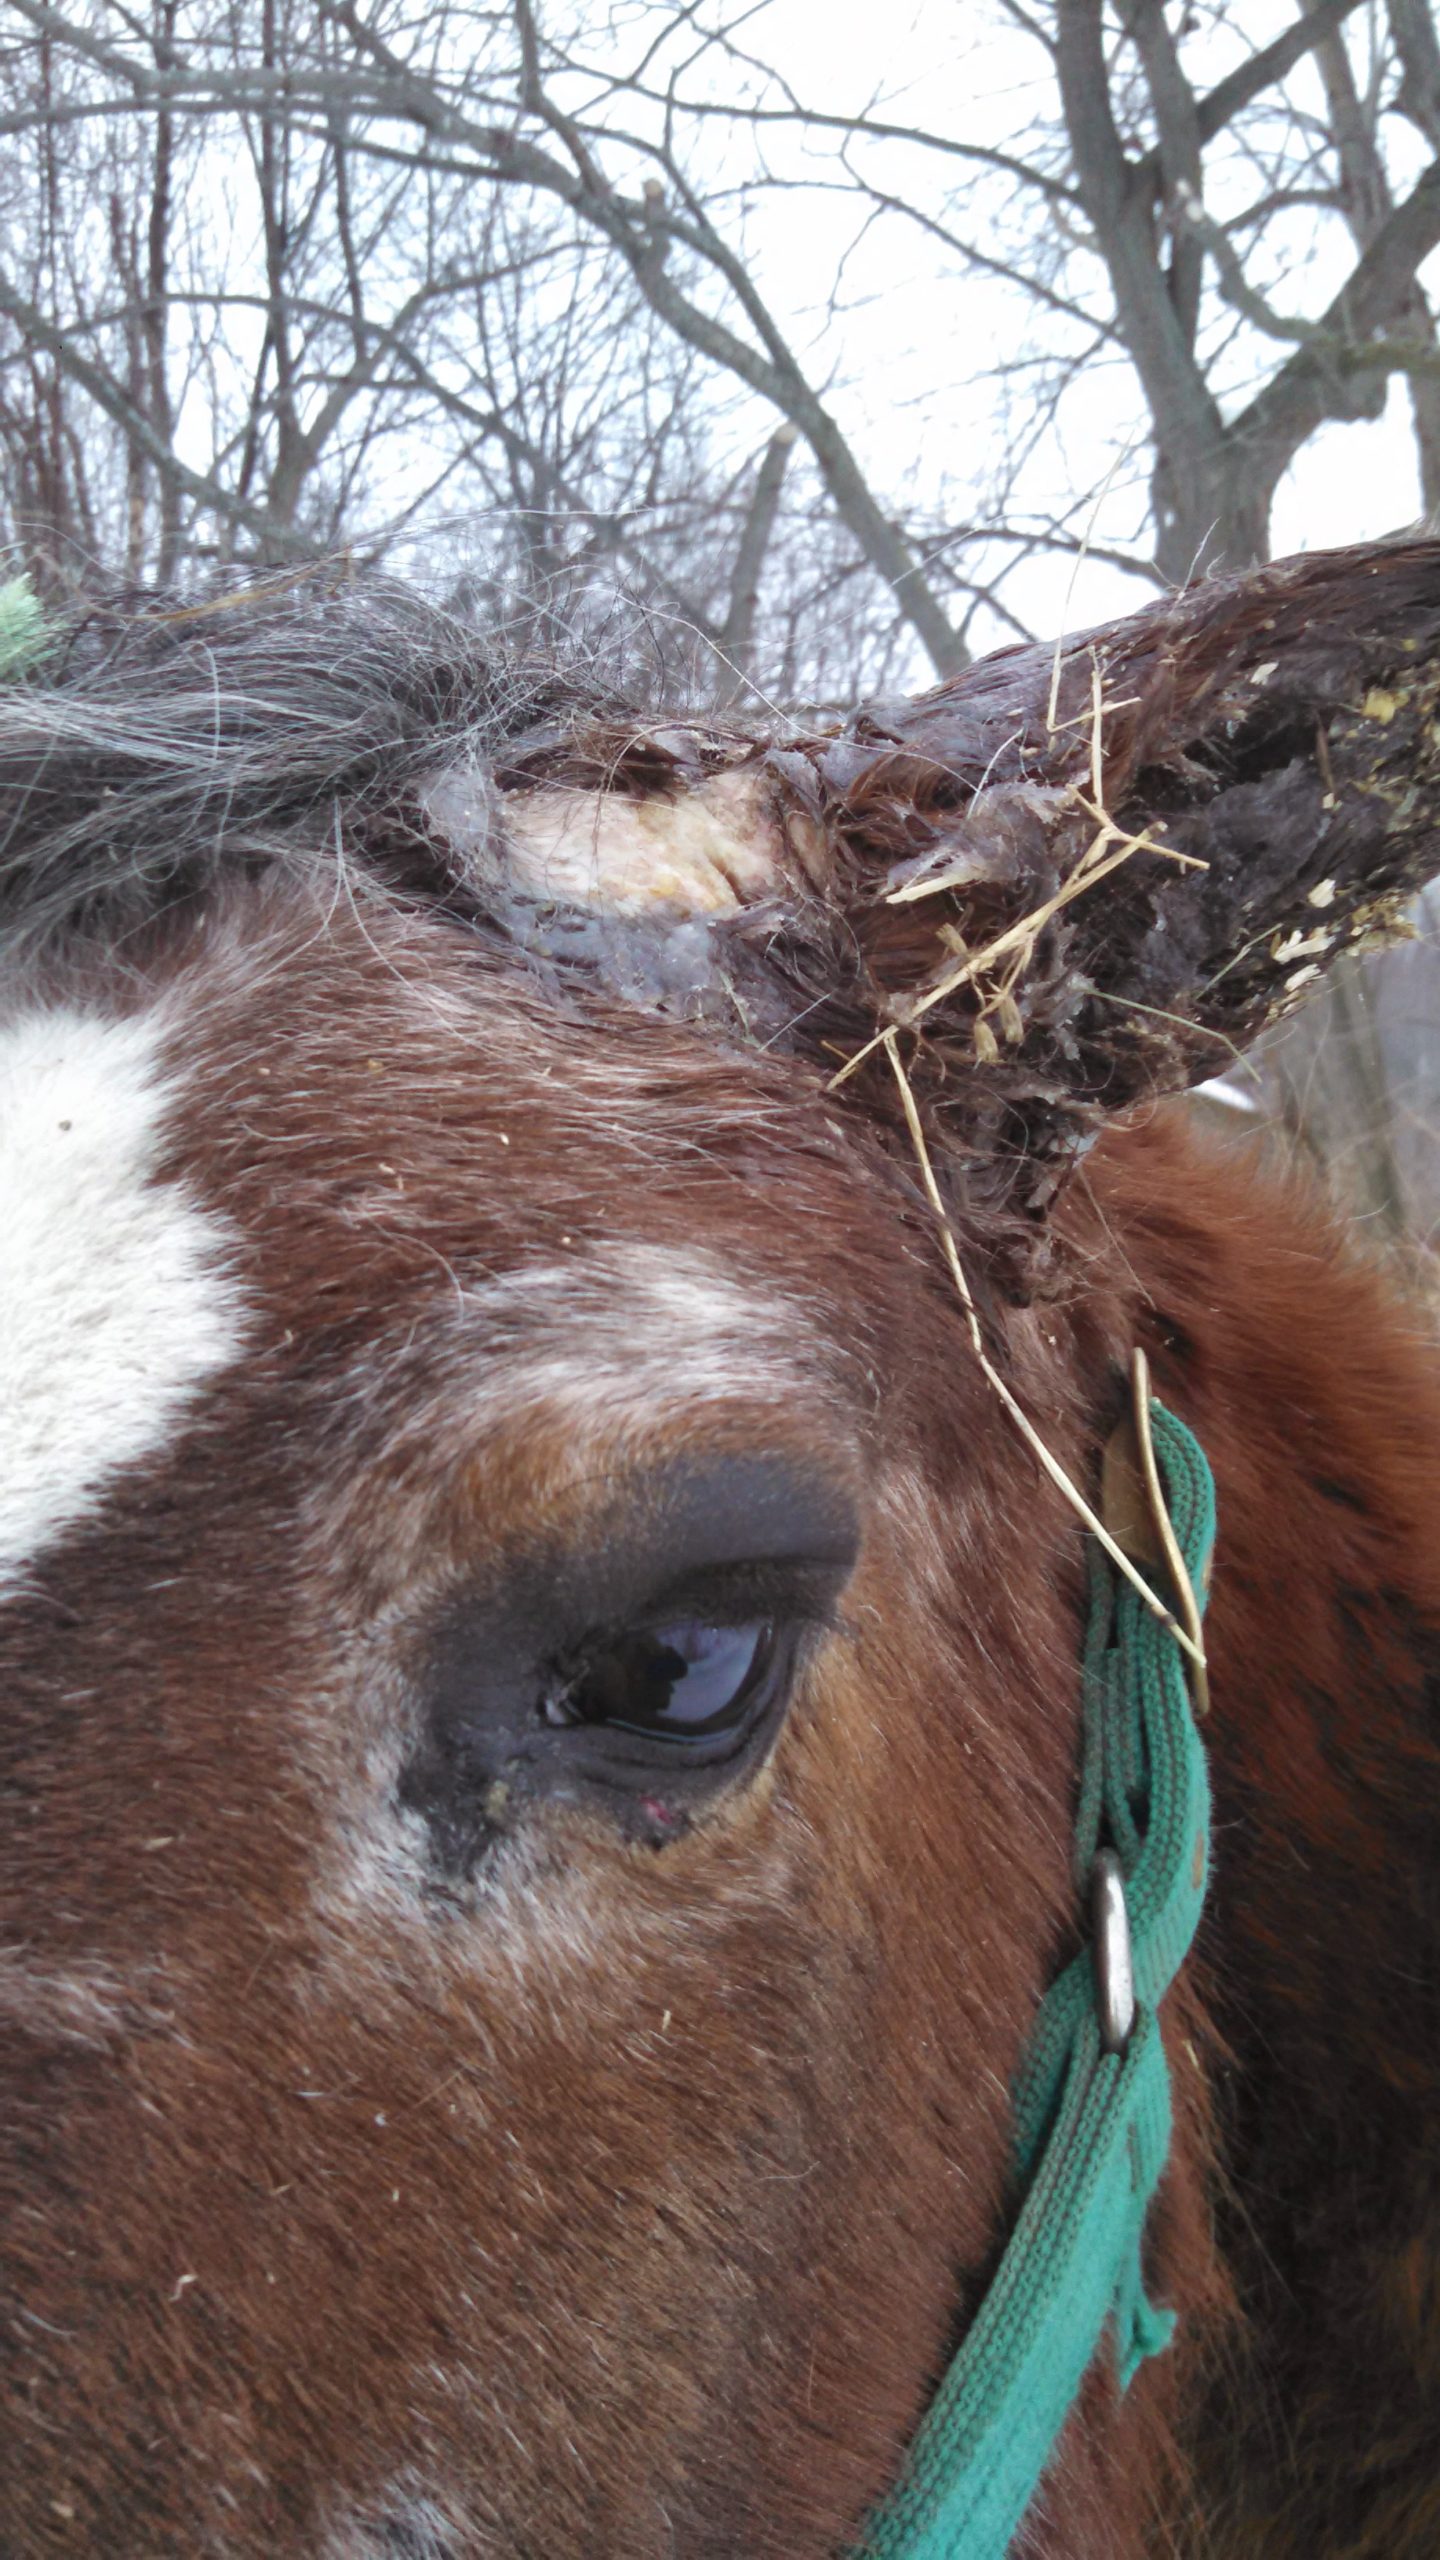
As the days went by we kept the area clean and re-applied Petroleum Jelly as needed. After a few days the skin around the base of his ear sluffed off and pink regenerative tissue appeared. The ear itself was still very swelled and he was unable to move it at all.
2 days later. Ear still not moving and swelled.
Skin sluffed off at base of ear.
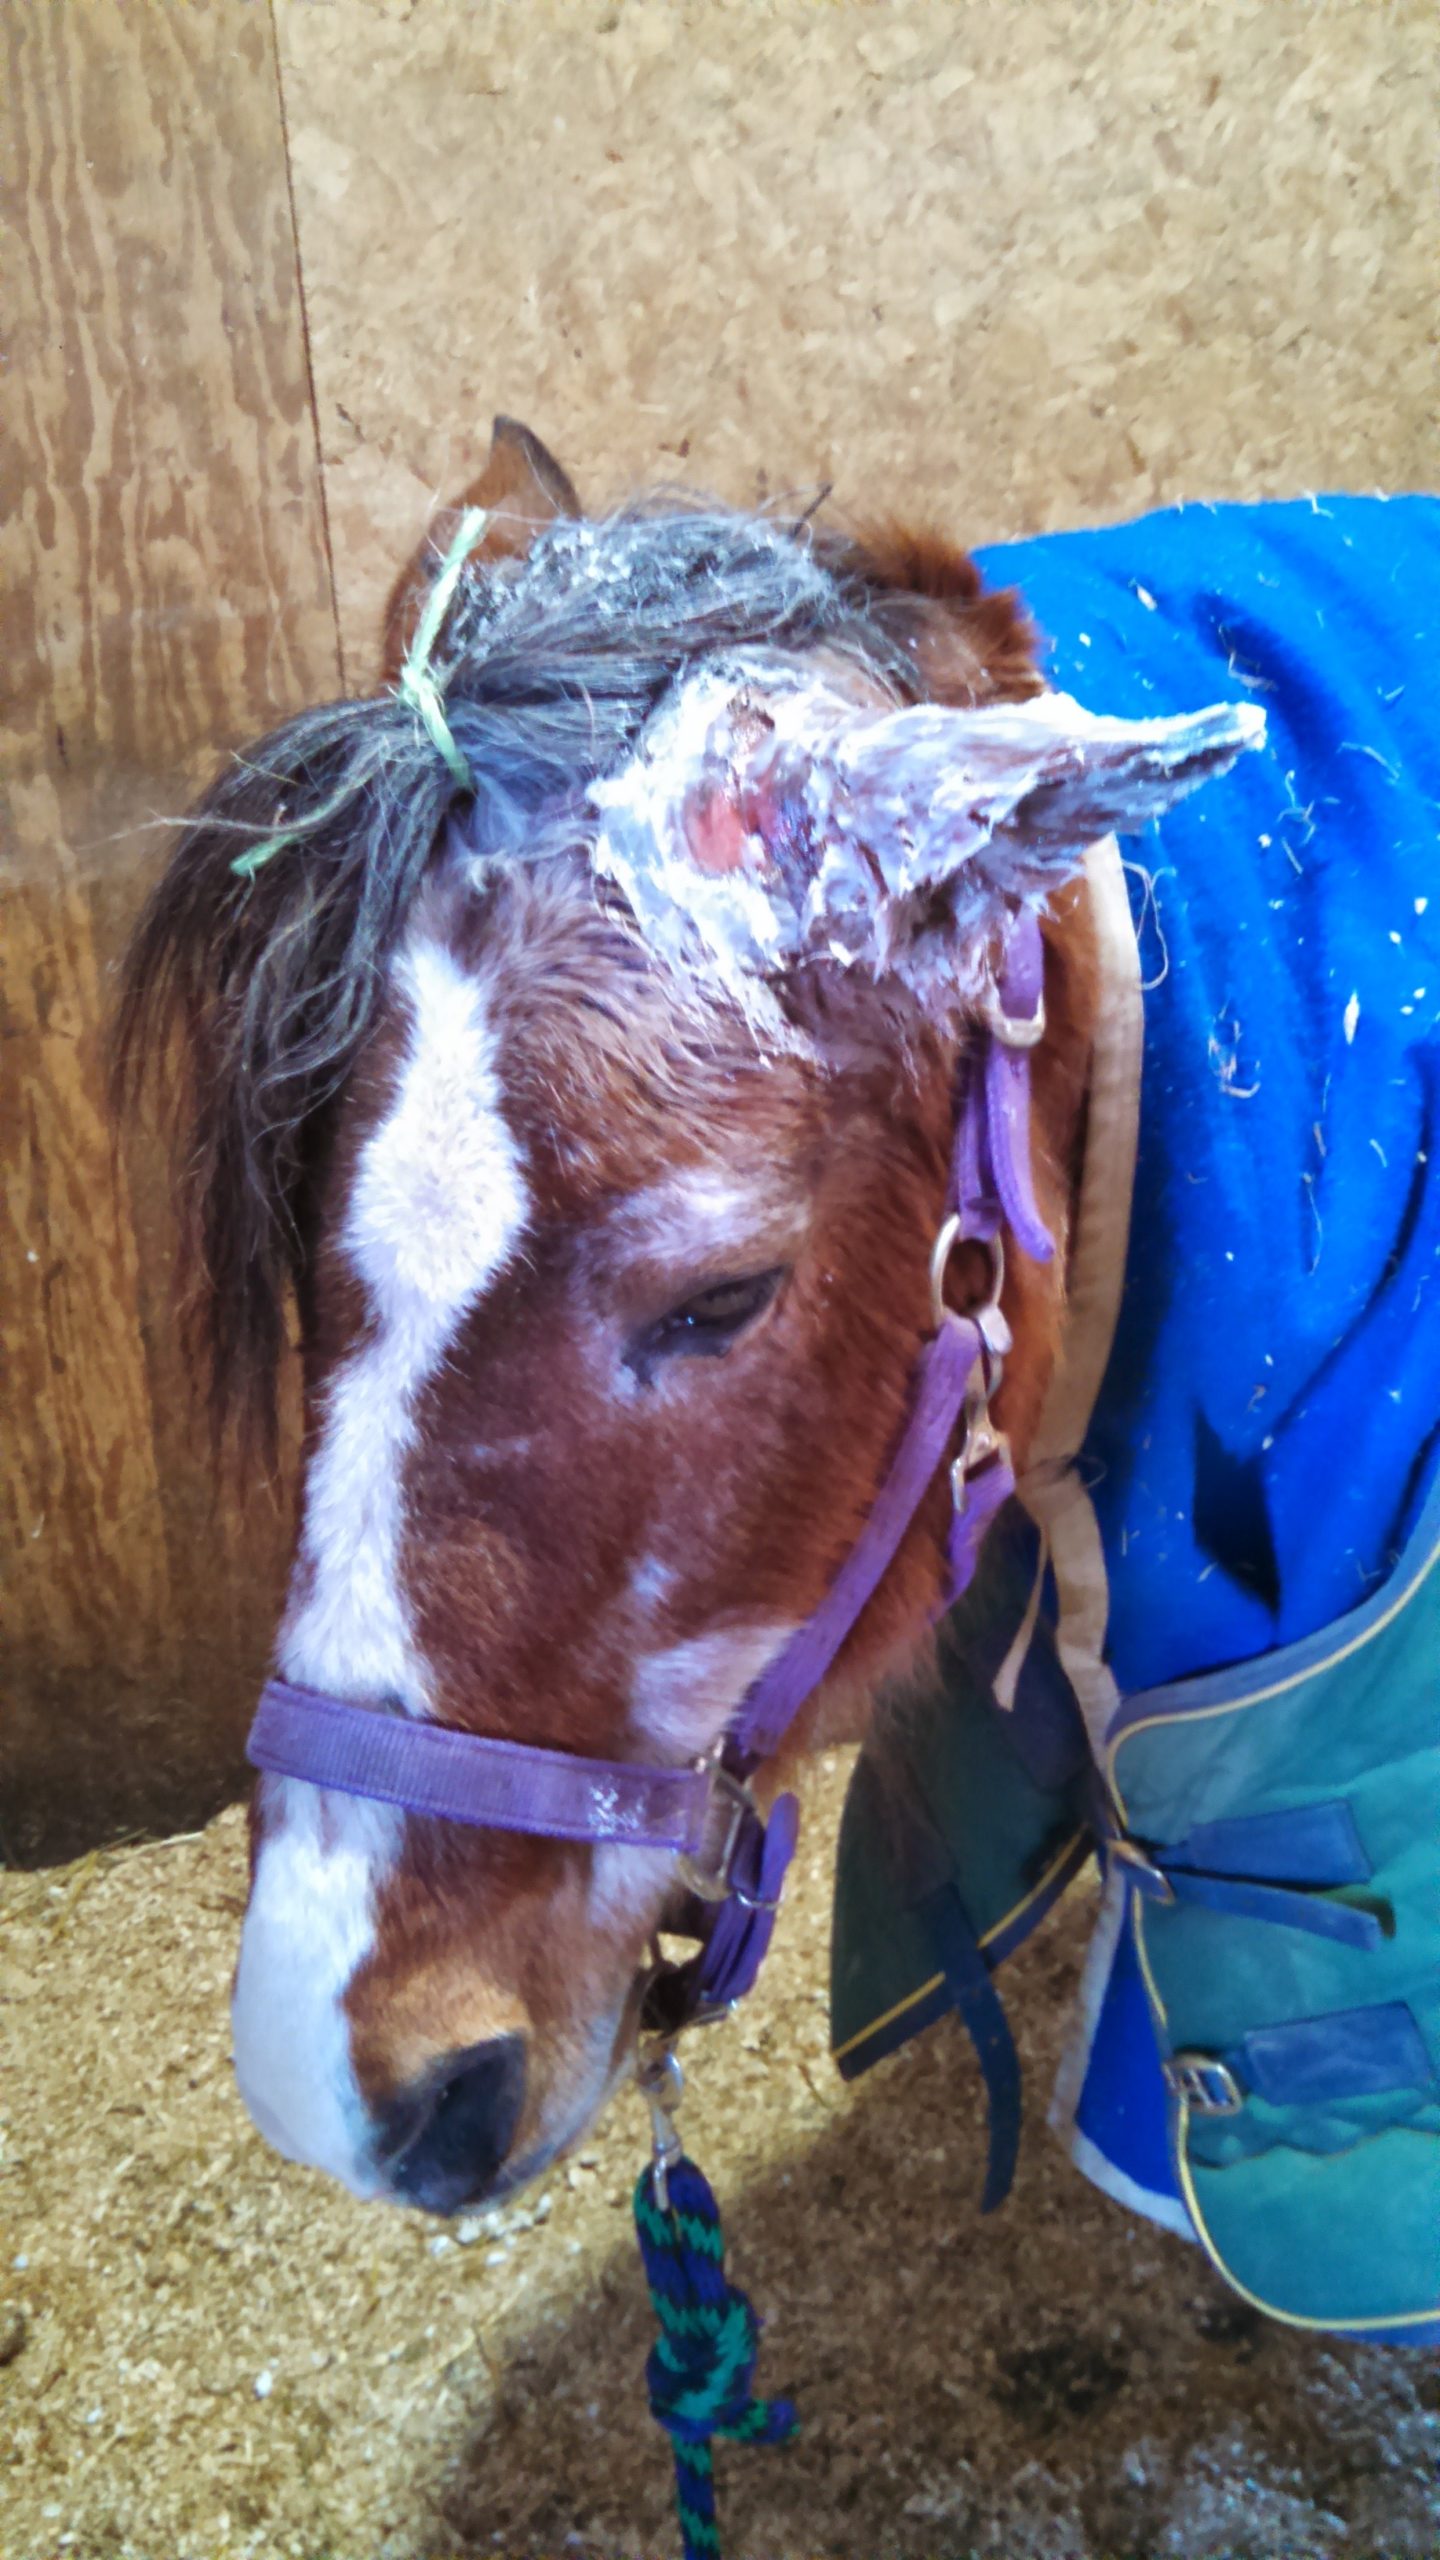
This was our life for another 2 weeks. Daily care of the ear and keeping the boy inside and out of the elements while it had time to heal. After 2 weeks this is what his ear looked like.
Frost bit Ear 2 weeks later.
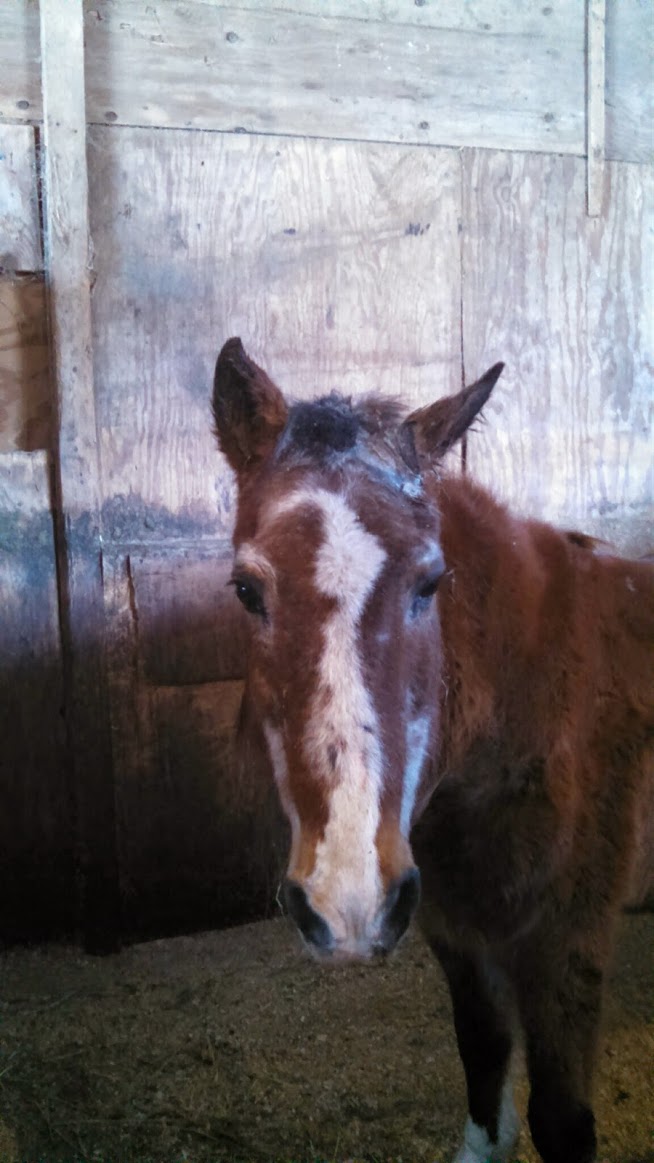
Things ALWAYS look worse before they get better. A sight like this kind of freaked me out but it was a good thing. Tissue was pink, blood is good. At this point no more Petroleum was being used but antibiotic cream was being applied. Winter fuzzies and the fact this boy had a TON of hair was getting annoying. With the cold temps we didn’t have the option to wash so the choice was made to cut off his locks so we could keep his wound clean. What a goofy looking lad he became. He still couldn’t move his ear at all but it was looking better!
You’ll have to excuse me for the lack of healing photos. The month of March that year brought me 3 beautiful foals so while I was tending to this old boy we had a lot of other stuff going on!
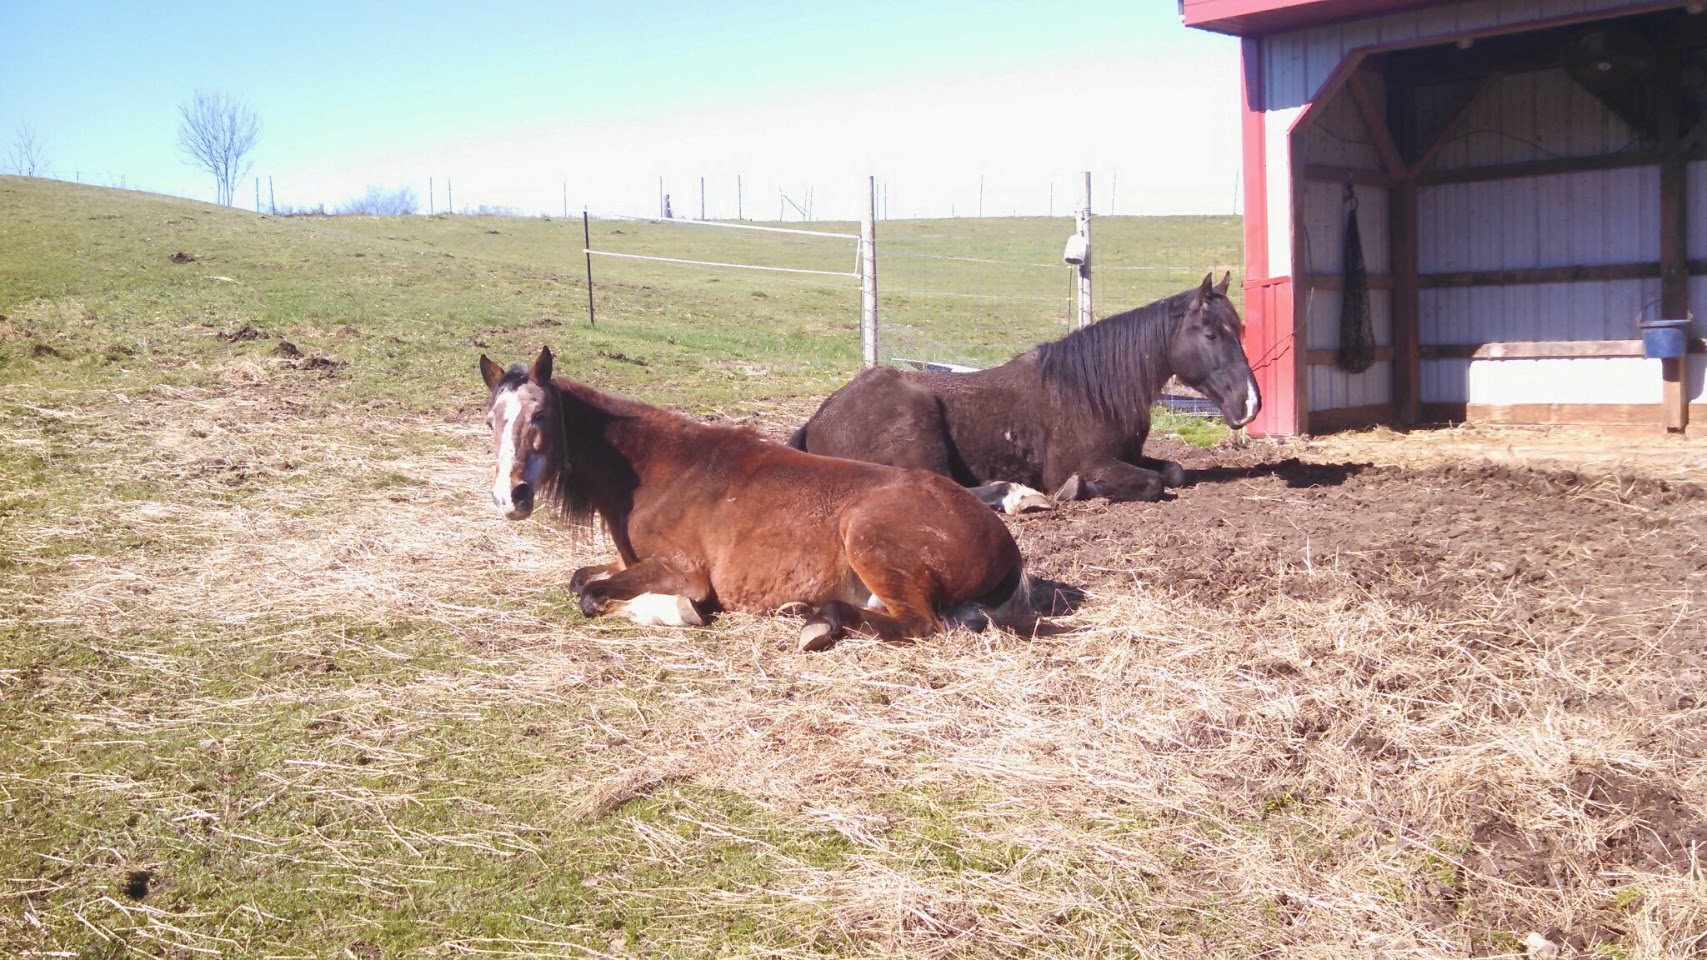
What I can tell you is that by April this is what he looked like! The swelling came down and his ear started to move again. By April he had 80% function of his bad ear. By May he had full range of motion.
2 Months and 80% range of motion
What caused this horse to get frostbite? With the help of barn cameras I was able to answer that question. Despite my best efforts that night, this old man ended up sticking his head outside of the run-in shed for the entire night! Why? I have no idea but he seemed to think it was a good idea. Horses, we’ll never know what goes through their heads. They’ll always find a way to challenge us and we love them for it.
Horses come and go on any farm and mine is no different. I acquired a 36″ mini a few years ago and what the heck do you do with a mini? Get it another mini as a friend of course, then lose the original mini due to Lyme disease and now your friend mini is alone so you obviously need another mini to keep that one company, oh heck lets make it 2. So you started out wanting no minis but through mini-math you end up with 3. Got it?
Ok, you now have 3 mini horses who do nothing but look cute and poop an amazing amount for such little animals. Time to put one to work! My day job switched my schedule around slightly, leaving this morning person with a few extra minutes a day to spare. Lets make those extra few minutes productive ones!
When I talk to people, they love to give me excuses. LOTS of excuses as to why they can’t or won’t train their horses and these are the main ones I hear all the most.
I have no time. Pft, sure you do. Follow along on this series and I’ll keep you updated with training my mini in just 10-20 min 3-5 days a week.
I can’t start, I don’t have a harness. It’s ok, we don’t plan on hitching to anything in a while. Heck, your horse might not even be a candidate to drive so don’t go off wasting $ on stuff you might not ever use. Teaching a horse to drive starts with line driving. You don’t need a harness for that, heck you don’t even need a bridle. Reins clipped onto a halter is what I start my guys in. You don’t need fancy reins either, if you’re really going to cry poor braid up some bailing twine and tie it on to the halter or be real fancy like and use snaps.
We’ve all seen it in the news or even know someone who had their barn burn down. Thankfully many times without loss of life to human or livestock but sometimes with disastrous consequences. So what should you do to help prevent fires and how to prep should one happen to you?
Planning:
– Fire Department – Get to know your fire department. Stop over and talk with them about what you can do to make your barn fire safe or what you may need to help them do their job better. For much of the information in this post I interviewed a wonderful Rochester Fire Fighter named …. Elvis.
– Space – Your little ½ ton pickup and bumper pull trailer can make it down your driveway and maneuver just fine but can a fire truck? How about multiple fire trucks? Keep in mind they are pretty big so keep driving lanes and turn arounds clear of vehicles and overhead branches.
– Water – Always a problem on farms that have wells. My well tank holds only 100 gallons at a given time and takes about 30 min to refresh. Way too slow to put out a fire. Swimming pools and ponds are a good thing to have within a short distance to your barn should you need them. Another reason for visiting your local fire house is to let them know what your water situation is and to find out if they have pumper trucks or not.
– Smoke Detectors – when the fireman I interviewed mentioned this ,my reply back was “but my animals don’t know what that means and I can’t hear it from the house.” He told me that it’s best to put them in any way. There’s always the potential you can hear it if outside. The animals may even act up at the sound and if you’re like me (watching from the kitchen window) you know when your animals are not in their normal “happy” state even if they are showing only passive signs.
– Fire Extinguishers – Keep one by every entrance to your barn and to the feed room.
Extinguishers have expiration dates on them. They typically will last just a few years. If your extinguisher has expired replace it. Your old one may still work but you don’t want to find out if it does or not when you need it.
Dry CO2 Extinguishers can fail due to inactivity. Once a month or so take time to beat your extinguisher. Pound it on the ground or better yet tip it upside-down and beat it with a rubber mallet. This will aggravate the dry contents so they don’t turn into cement on you.
– Halters and Leads – You should have enough halters and leads that fit every single animal in your barn and on your property. Keep them tidy and in easy to find areas. Not only is this good for fires but for any time you may need to evacuate your farm.
– Lightning Rods – Self explanatory
– Emergency numbers – Keep them not only in your barn but also in every single other building on your property. No good having them I the barn if it’s on fire. My friendly interviewed fire fighter also suggests knowing the local number to your fire house not just 911. It could mean getting help to you even faster if calling from a cell phone which is forced to use E911.
– Evacuation Plan – If you manage to get your livestock out the barn where are you going to put them? On my farm animals all have free access to the barn and are never locked in. Should the barn catch fire I can easily herd animals away from the barn and into the fields keeping them 100ft away from the barn.
Prevention:
– Clean barn – Keep your barn free of cobwebs and loose hay or straw. Dust buildup on electrical outlets could cause shorts too. We all know rodents will eat through electrical wire so keep a cat around to keep those pests out too. Keep weeds and brush away from yoru barn. Round-up or string trim everything back.
– Hay storage – ideally you’ll want to store your hay in another building NOT attached to your livestock area. However, in WNY many barns have lofts so keep these tips in mind:
Most hay fires occur within 6 weeks of bailing. For the first few months of having new hay in your barn check it daily to see if there is any suspicious heat coming from them. You will know a bad bale when you feel it. It will be extremely hot to the touch and steam will come out of it if you cut the bale open. Use caution and don’t burn yourself when removing bad bales.
Air flow – It drives me crazy to see hay lofts shut up tight. Hay needs to breath… keep the loft doors open. When stacking hay do NOT stack it right up against the wall. Instead leave it 2-3 feet away from the wall so that air can move around the bales. Also, stack the bales up on pallets so air can flow underneath. More airflow = dry hay which will be less likely to ignite on its own.
Clean your hay storage area at the end of every season. Sweep out old hay and dirt before you put the next year’s hay in.
– Bedding storage – bedding can burn just as easily as hay… Hello wood pellet stoves! Keep only enough bedding in the barn to do that day’s chores. If you need an extra out-building to store extra bedding/hay/feed pick up a Garage-in-a-box at Tractor Supply. $250 for a 12x8x20 holds a lot of stuff and will keep it away from your livestock.
– Mulch – I would have never of thought of this. Elvis told me a story about how last year he had to put out a fire because the landscape mulch spontaneously combusted. I guess I’ll be decorating with rocks from now on.
– Electrical – In an old barn or even a new one there are a lot of electrical issues that can occur.
Cleaning – we already covered this but keep your barn clean!
Extension cords – They are meant for one time uses not semi-permanent or permanent solutions. If you find an area where you are constantly running an extension cord for a heated bucket or light then spend the time and $ to put a proper outlet there.
Plug Strips – Same goes for plugging multiple things into 1 outlet. It is nice to have a plug strip but plugging too many things into 1 outlet can overload the wire which in turn heats up, catches a cobweb or hay on fire and poof, your place goes up like a match stick again.
Appliances – When possible unplug your appliances such as radios or coffee pots. If using heated buckets, fans or portable heaters check them frequently. Don’t let dust build up on fan blades or dirt get worked into the plug of your water bucket.
My weekend was a busy one. With winter coming so are my winter horse boarders. This year I ended up filling up my 20×35 run-in shed with hay which means I needed a place for the horses to get out of the wind, rain, and snow. The problem? Yeah I’m broke. So after researching shelters that are frequently used for alpacas, sheep, goats, and other small livestock I got to thinking; Why can’t it be modified for horses? The general idea was to use cattle panels for a shelter as I saw at this site.
Saturday morning I woke up with an “ah ha” moment on how to modify the cattle panel shelter for horses. The idea was to sink some wood posts, use 3/4″ plywood as a kick board, and attach the panels to that.
How to build the horse run-in shed shelter barn
My Supply List
(8) pressure treated posts (round or 4×4 will work)
(3) 3/4″ ply wood sheets – non treated ok if painted
(3) Cattle Panels 52″ x 16′
12×16 heavy duty tarp
box of 2″ screws
box of fence staples
30 thick UV black cable ties 11″
100 8″ UV black cable ties
Can of barn/fence paint
Paint Brush
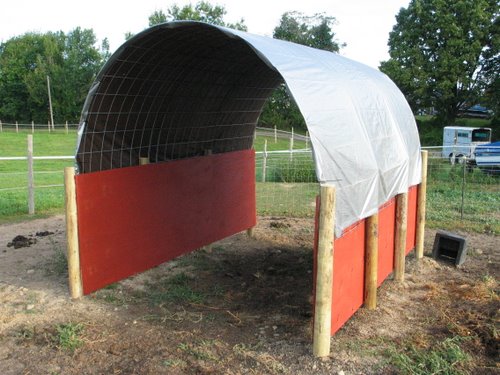
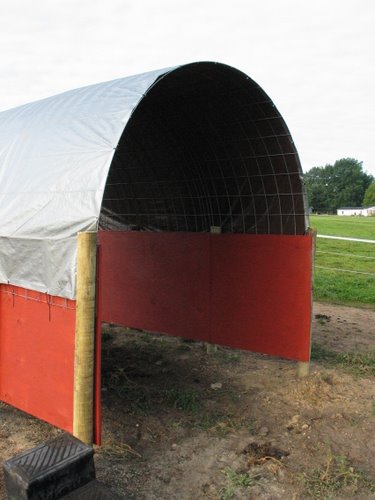
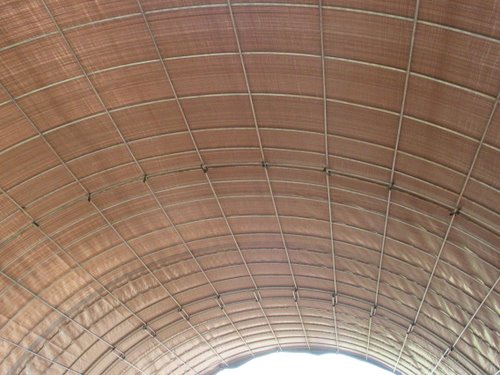
I placed the posts 4′ apart down the long side and 9′ wide. We get some good snow and wind storms so I didn’t want to put the posts any wider or the dome wouldn’t hold the wind/snow load. Once the posts were in I put up the ply wood and made sure it was level holding it up with just a couple of screws temporarily.
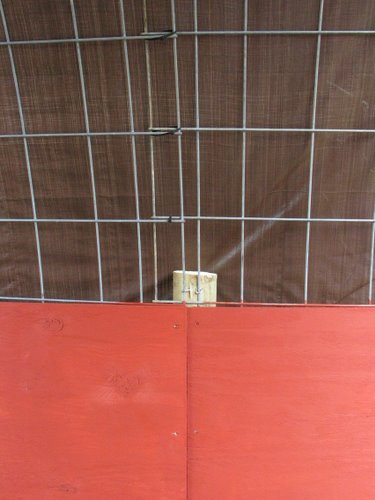
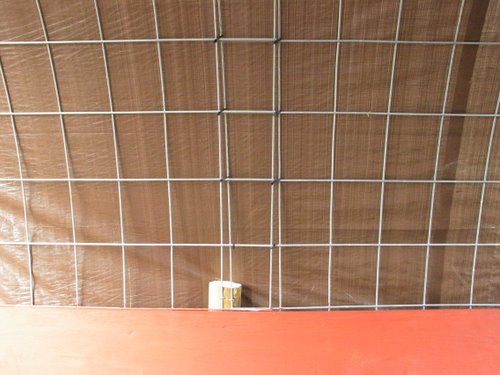
So far this was all a 1 person job. I needed help to put the cattle panels in place. We bent them up and placed them between the posts and the ply wood pushing them down 2 squares on each side and then screwed the plywood back to the posts. I also held the panels to the top of the posts with staples.
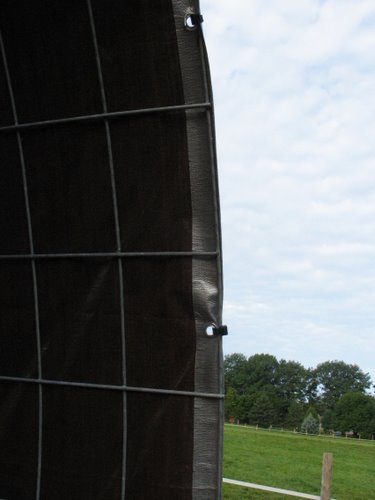
We over lapped the cattle panels as seen in the photos and secured them heavily with cable ties.
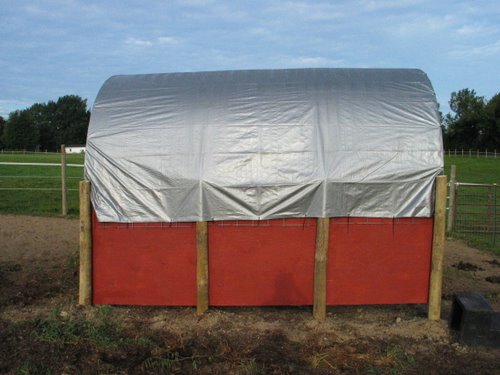
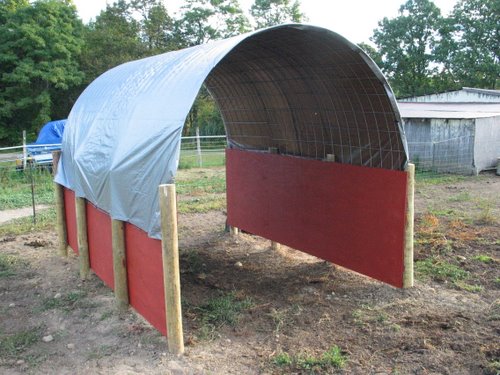
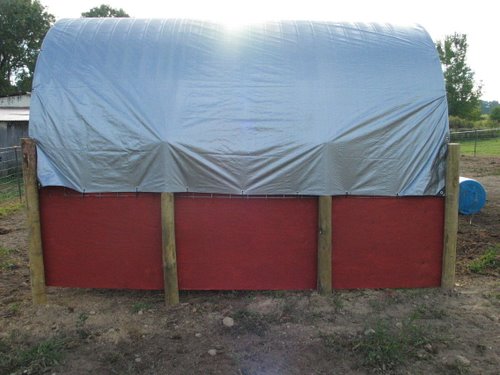
Putting the tarp on was easy, I unfolded it, tied a rope to the 2 end corners and threw the top over the dome and pulled the tarp up and over. I made sure it was even and secured it down with cable ties.
Finishing touch was to paint the plywood so it would weather better. You can paint the plywood before securing it but I really didn’t have a place to paint it first and found it easier to paint it after it was up and off the ground.
Cost: $250 Time: 4hrs – This assume you have a Post Hole Digger or Pounder on your tractor or have rented one.
————————————————————— UPDATE: On 9/28-29/09 we had some nasty storms roll through. Sustained winds of 20mph and gusts fof 50mph. The shelter held fast and didn’t appear to even move in the wind. I thought the horses would be afraid of the sound of the tarp or the cattle panel roof as the wind hit it but nope. Even my scardy-cat took cover in the shelter. I have high hopes for it this winter. I do plan on brushing snow build up on it not to give it any excuse to sag.
————————————————————– UPDATE: on 10/25/09 Well the winds have snapped off some of the thick cable ties holding the taprt to the cattle panels. I’ve decided to replace them with twine from my hay bales. I folded the twine in half and made sure the knot was tight. I’ve had twine hold a fence gate up for 2 years before it failed so there’s no doubt in my mind it’ll be up to the job of holding a tarp on.
————————————————————– UPDATE: 12/5/09:
So far so good. We’ve been putting the Big Bale Buddy in the center of the run-in which is keeping the hay dry and allowing 4 horses, 2 on each side, eat without a problem.
————————————————————– UPDATE: 3/26/2012:
This year I had to put up new panels and a new tarp. Nasty wind storms of 70+ mph along with wet snow collapsed the roof finally. The new roof I put up I decided to shorten a bit and slid the cattle panels down an extra foot on each side. I’ve also gotten good enough moving the panels that I replaced the whole thing by myself with no assistance!
————————————————————– UPDATE: 5/15/2012:
I just got some photos from someone else who made one of these shelters. She made some changes to fit her needs and here’s what she said….
Well I finally finished the run in and I think it came out great!. We adjusted your plan a little. I put pressure treated 2×8’s along the bottom so the plywood wouldn’t rot and put silicone in between the plywood and the pressure treated boards. We also used pine 2×8’s to hold down the cattle panels in addition to putting them behind the posts. I bolted those on to secure them really well. I cemented all the posts to steady everything. I bought a heavy duty tarp hoping that will hold. I put some plastic edging on the plywood inside so they wouldn’t chew on the wood. I have a young boy who loves to chew. Of course they are really afraid of it since I put the tarp on. It will take time for them to get used to it. If I feed them in there they will eventually come around. The size is about 9′ x 24′. I thought it was way too big but it seems fine.