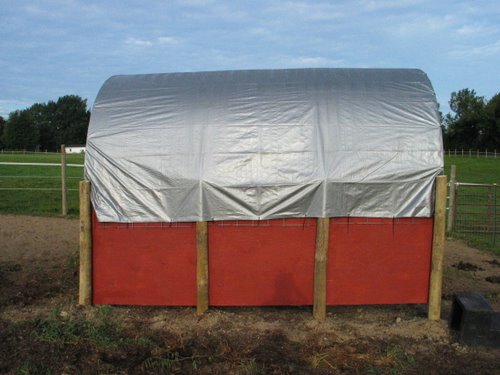
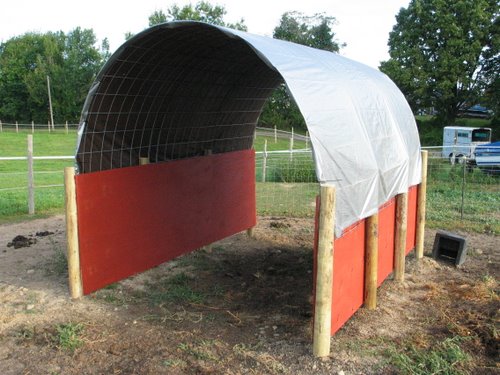
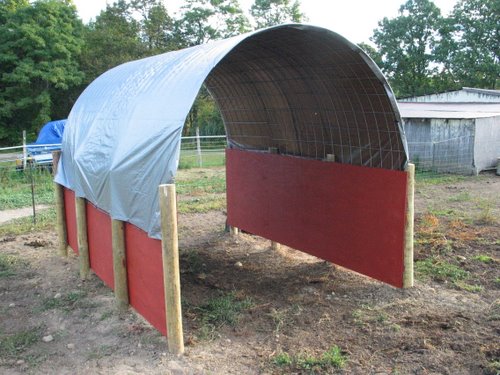
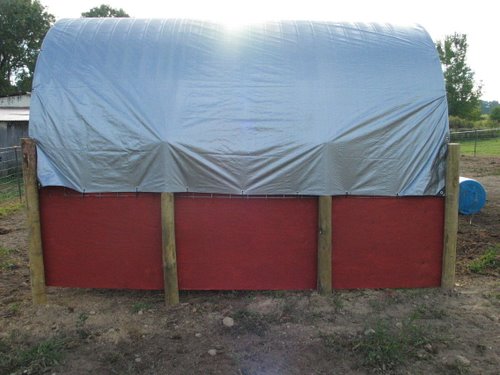
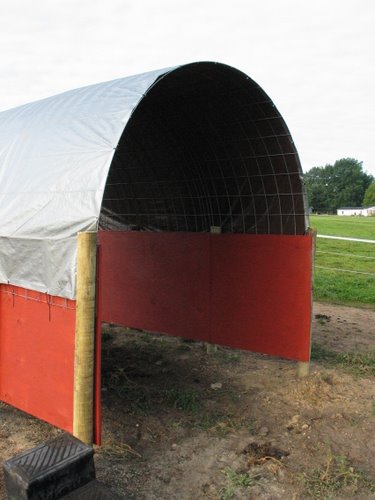
My weekend was a busy one. With winter coming so are my winter horse boarders. This year I ended up filling up my 20×35 run-in shed with hay which means I needed a place for the horses to get out of the wind, rain, and snow. The problem? Yeah I’m broke. So after researching shelters that are frequently used for alpacas, sheep, goats, and other small livestock I got to thinking; Why can’t it be modified for horses? The general idea was to use cattle panels for a shelter as I saw at this site.
Saturday morning I woke up with an “ah ha” moment on how to modify the cattle panel shelter for horses. The idea was to sink some wood posts, use 3/4″ plywood as a kick board, and attach the panels to that.
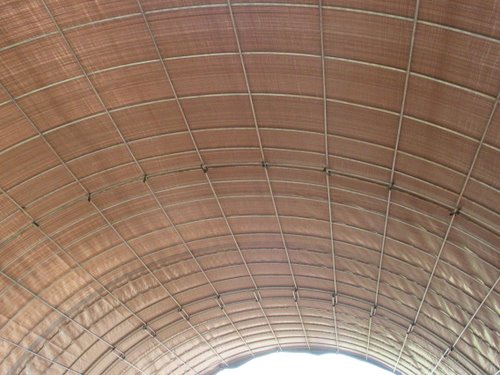
How to build the horse run-in shed shelter barn
My Supply List
- (8) pressure treated posts (round or 4×4 will work)
- (3) 3/4″ ply wood sheets – non treated ok if painted
- (3) Cattle Panels 52″ x 16′
- 12×16 heavy duty tarp
- box of 2″ screws
- box of fence staples
- 30 thick UV black cable ties 11″
- 100 8″ UV black cable ties
- Can of barn/fence paint
- Paint Brush
I placed the posts 4′ apart down the long side and 9′ wide. We get some good snow and wind storms so I didn’t want to put the posts any wider or the dome wouldn’t hold the wind/snow load. Once the posts were in I put up the ply wood and made sure it was level holding it up with just a couple of screws temporarily.
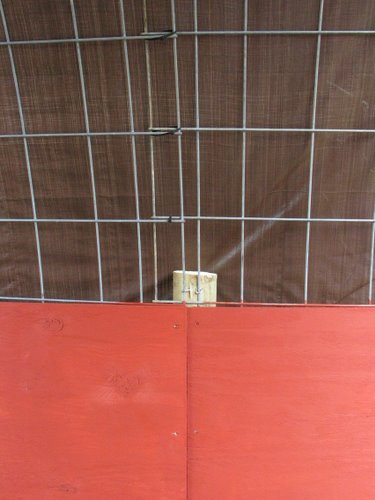
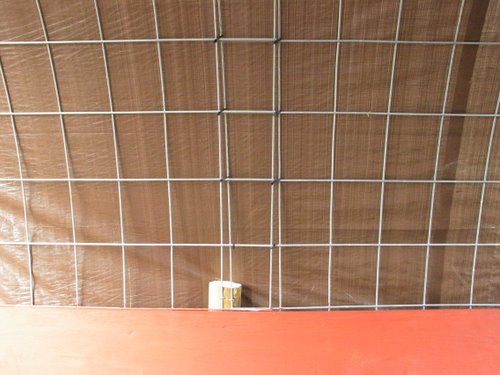
So far this was all a 1 person job. I needed help to put the cattle panels in place. We bent them up and placed them between the posts and the ply wood pushing them down 2 squares on each side and then screwed the plywood back to the posts. I also held the panels to the top of the posts with staples.
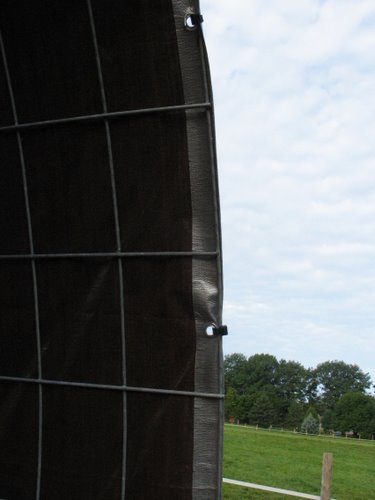
We over lapped the cattle panels as seen in the photos and secured them heavily with cable ties.
Putting the tarp on was easy, I unfolded it, tied a rope to the 2 end corners and threw the top over the dome and pulled the tarp up and over. I made sure it was even and secured it down with cable ties.
Finishing touch was to paint the plywood so it would weather better. You can paint the plywood before securing it but I really didn’t have a place to paint it first and found it easier to paint it after it was up and off the ground.
Cost: $250
Time: 4hrs – This assume you have a Post Hole Digger or Pounder on your tractor or have rented one.
—————————————————————
UPDATE: On 9/28-29/09 we had some nasty storms roll through. Sustained winds of 20mph and gusts fof 50mph. The shelter held fast and didn’t appear to even move in the wind. I thought the horses would be afraid of the sound of the tarp or the cattle panel roof as the wind hit it but nope. Even my scardy-cat took cover in the shelter. I have high hopes for it this winter. I do plan on brushing snow build up on it not to give it any excuse to sag.
————————————————————–
UPDATE: on 10/25/09 Well the winds have snapped off some of the thick cable ties holding the taprt to the cattle panels. I’ve decided to replace them with twine from my hay bales. I folded the twine in half and made sure the knot was tight. I’ve had twine hold a fence gate up for 2 years before it failed so there’s no doubt in my mind it’ll be up to the job of holding a tarp on.
————————————————————–
UPDATE: 12/5/09:
So far so good. We’ve been putting the Big Bale Buddy in the center of the run-in which is keeping the hay dry and allowing 4 horses, 2 on each side, eat without a problem.
————————————————————–
UPDATE: 3/26/2012:
This year I had to put up new panels and a new tarp. Nasty wind storms of 70+ mph along with wet snow collapsed the roof finally. The new roof I put up I decided to shorten a bit and slid the cattle panels down an extra foot on each side. I’ve also gotten good enough moving the panels that I replaced the whole thing by myself with no assistance!
————————————————————–
UPDATE: 5/15/2012:
I just got some photos from someone else who made one of these shelters. She made some changes to fit her needs and here’s what she said….
Well I finally finished the run in and I think it came out great!. We adjusted your plan a little. I put pressure treated 2×8’s along the bottom so the plywood wouldn’t rot and put silicone in between the plywood and the pressure treated boards. We also used pine 2×8’s to hold down the cattle panels in addition to putting them behind the posts. I bolted those on to secure them really well. I cemented all the posts to steady everything. I bought a heavy duty tarp hoping that will hold. I put some plastic edging on the plywood inside so they wouldn’t chew on the wood. I have a young boy who loves to chew. Of course they are really afraid of it since I put the tarp on. It will take time for them to get used to it. If I feed them in there they will eventually come around. The size is about 9′ x 24′. I thought it was way too big but it seems fine.
CLICK HERE to see photos of her shed
————————————————————–
