Feeding and Weaning a Bottle Fed Cria

Well I must say that our first experience with birthing and raising a cria has been an exciting one.  I wasn’t expecting to be so involved though.  I thought I’d share with you our hands on 2 month timeline for raising our little Albina. 

There are many different opinions of what to feed cria. Here is the milk cocktail we chose to feed.

2 large spoonfuls of store brand probiotic vanilla yogurt.  Cover yogurt with half/half (~ 3-4oz), fill rest of the bottle with Vitamin D whole milk.  Leave some air in the bottle and shake very well to mix in all the yogurt.  Warm the bottle in a pot of water and it’s ready to serve.  Depending on quantity of milk we chose to feed in a 9oz glass human baby bottle or in a 24oz soda bottle with a flutter lamb nipple.  Cut an ‘X’ in the nipples so that milk flows freely. 

Day 1:
Weight: 20lbs
Albina was able to stand and walk within 40 minutes of birth.  She had a great suck reflex and tried to suckle on the wall.  We checked mom for milk but she was dry.  We repeatedly applied a hot cloth to mom’s belly but no milk dropped.  By hour #2 we decided to mix up some powdered colostrum.   (NOTE:  Learn from our mistake to NOT use powdered colostrums, it does nothing.  Try for fresh cow/goat or frozen llama/goat.)  Baby drank down 24oz of (what we thought was useful) colostrum in 12 hrs. 4oz every 2hrs or so.

Day 2:
We continued to apply hot towels to mom’s belly and finally started to get milk.  YIPPY! Or so we thought.  We pointed baby at mom’s udder but she freaked out, kicked and sat on her baby.  Back to the bottle.  We mixed in the last bit of useless colostrum, with some electrolytes into the above milk cocktail and Albina continued to drink well. 

We took Albina and mom to the vet for a checkup and an IGG and BVD test.  Both came back with a clean bill of health and a 24hr wait for test results from the blood work.

Feeding schedule was 4oz every 2hrs around the clock total of 48oz of milk. Albina drinks bottle without human contact.  We put the bottle in a feeder and she feeds herself.  See Self Feeding Bottle Baby

How much should a cria drink?  10% of body weight to maintain.  15% of body weight to grow.  
15% of 20lbs = 3 pounds = 48oz of milk.  

Day 3:
Feeding still at 4oz every 2hrs around the clock
Weight: dropped to 19.8 lbs

IGG test came back at a ZERO!  Yikes.  Lessoned learned about powdered colostrum. Next time we will be getting fresh cow’s colostrum from the dairy at the end of our road.  Back to the vet we went for a plasma transfusion.

Day 4:
Feeding 4oz every 2hrs around the clock.  Getting very tired.

Day 5:
Feeding 4oz every 2hrs around the clock.  Back to the vet for another IGG test
Weight: 22lbs

Day 6:
Tried feeding in the middle of the night.  Cut out the 2am and 4am feeding… now feeding 6am, 9am, noon, 2pm, 4pm, 6pm, 10pm.  Albina is drinking 7-9oz per feeding now.  IGG Came back at 800!  Yippy!

Week 2:
Still feeding at the Day 6 schedule and she is consistently drinking 8-9oz a feeding all week

Week 3:
New feeding schedule: 6am, 10am, 2pm, 6pm, 10pm She is a piggy and is now consuming 64-70oz a day. We stopped feeding out of 9oz baby bottles and now are using a lamb nipple on a 24oz Mt Dew bottle.

Week 4:
New feeding Schedule: 7am, noon, 5pm, 9pm  Still is consuming 64-70oz a day.

Week 5 & 6:
New feeding schedule: 7am, 3pm, 9pm She is now drinking over 70oz a day

Week 7 & 8
New feeding schedule: 8am & 9pm She’s losing interest in milk all together beginning of week 8 and often refuses the bottle or only drinks 2-4oz.  By now she’s happily eating grass, grain, hay and uses the bottle more for a water supplement than for nourishment.

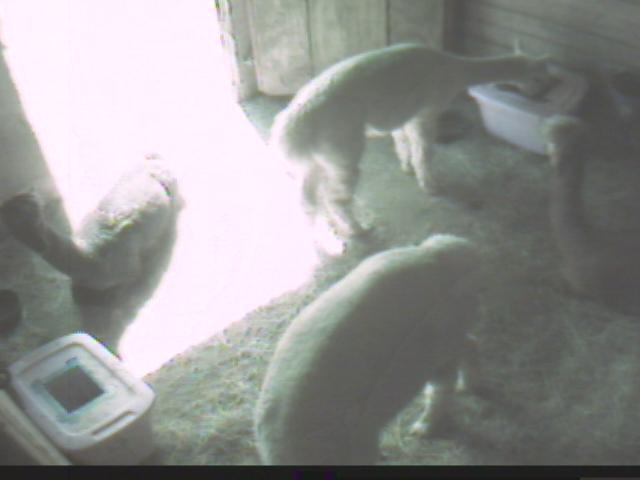
Weaning:  At the end of week 8 she was drinking only 6oz a day maybe.  I made the decision to cut her off fully.  She weighs 52lbs now and is very independent, strong and healthy.  My only concern was her water intake but recent barn cam footage shows she is drinking.  I did consult a vet about weaning at 2 months of age since usually cria will nurse off mom until 6 months or more. They assured me that 2 months is perfectly fine for weaning as long as the cria has a creep feeder with as much hay and grain they want that adults can’t get to.
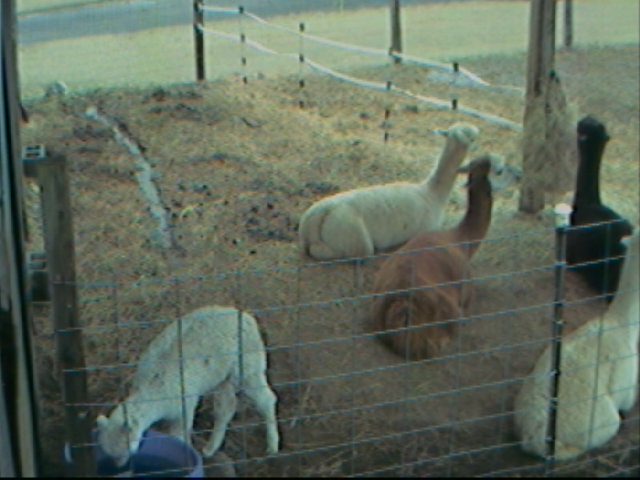
beaniedrink
Albina drinking water @ 2 months old

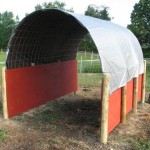
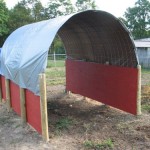
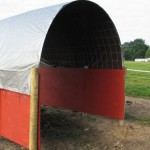
Economy Horse Run-In Shed Shelter Barn

My weekend was a busy one.  With winter coming so are my winter horse boarders.  This year I ended up filling up my 20×35 run-in shed with hay which means I needed a place for the horses to get out of the wind, rain, and snow. The problem?  Yeah I’m broke.  So after researching shelters that are frequently used for alpacas, sheep, goats, and other small livestock I got to thinking; Why can’t it be modified for horses?   The general idea was to use cattle panels for a shelter as I saw at this site.

Saturday morning I woke up with an “ah ha” moment on how to modify the cattle panel shelter for horses.  The idea was to sink some wood posts, use 3/4″ plywood as a kick board, and attach the panels to that.

How to build the horse run-in shed shelter barn
My Supply List

  • (8) pressure treated posts (round or 4×4 will work)
  • (3) 3/4″ ply wood sheets – non treated ok if painted
  • (3) Cattle Panels 52″ x 16′
  • 12×16 heavy duty tarp
  • box of 2″ screws
  • box of fence staples
  • 30 thick UV black cable ties 11″
  • 100 8″ UV black cable ties
  • Can of barn/fence paint
  • Paint Brush

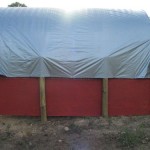
I placed the posts 4′ apart down the long side and 9′ wide.   We get some good snow and wind storms so I didn’t want to put the posts any wider or the dome wouldn’t hold the wind/snow load.  Once the posts were in I put up the ply wood and made sure it was level holding it up with just a couple of screws temporarily.

So far this was all a 1 person job.  I needed help to put the cattle panels in place.  We bent them up and placed them between the posts and the ply wood pushing them down 2 squares on each side and then screwed the plywood back to the posts.  I also held the panels to the top of the posts with staples.

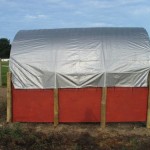
We over lapped the cattle panels as seen in the photos and secured them heavily with cable ties.

Putting the tarp on was easy, I unfolded it, tied a rope to the 2 end corners and threw the top over the dome and pulled the tarp up and over.   I made sure it was even and secured it down with cable ties.

Finishing touch was to paint the plywood so it would weather better.  You can paint the plywood before securing it but I really didn’t have a place to paint it first and found it easier to paint it after it was up and off the ground.

Cost:  $250
Time: 4hrs – This assume you have a Post Hole Digger or Pounder on your tractor or have rented one.


—————————————————————
UPDATE: On 9/28-29/09 we had some nasty storms roll through.  Sustained winds of 20mph and gusts fof 50mph.  The shelter held fast and didn’t appear to even move in the wind.  I thought the horses would be afraid of the sound of the tarp or the cattle panel roof as the wind hit it but nope.  Even my scardy-cat took cover in the shelter.  I have high hopes for it this winter.  I do plan on brushing snow build up on it not to give it any excuse to sag.
————————————————————–
UPDATE: on 10/25/09 Well the winds have snapped off some of the thick cable ties holding the taprt to the cattle panels.  I’ve decided to replace them with twine from my hay bales.  I folded the twine in half and made sure the knot was tight. I’ve had twine hold a fence gate up for 2 years before it failed so there’s no doubt in my mind it’ll be up to the job of holding a tarp on.
————————————————————–
UPDATE: 12/5/09:
So far so good.  We’ve been putting the Big Bale Buddy in the center of the run-in which is keeping the hay dry and allowing 4 horses, 2 on each side, eat without a problem.
————————————————————–
UPDATE: 3/26/2012:
This year I had to put up new panels and a new tarp.  Nasty wind storms of 70+ mph along with wet snow collapsed the roof finally.  The new roof I put up I decided to shorten a bit and slid the cattle panels down an extra foot on each side.  I’ve also gotten good enough moving the panels that I replaced the whole thing by myself with no assistance!
————————————————————–
UPDATE: 5/15/2012:
I just got some photos from someone else who made one of these shelters.  She made some changes to fit her needs and here’s what she said….

Well I finally finished the run in and I think it came out great!. We adjusted your plan a little. I put pressure treated 2×8’s along the bottom so the plywood wouldn’t rot and put silicone in between the plywood and the pressure treated boards. We also used pine 2×8’s to hold down the cattle panels in addition to putting them behind the posts.  I bolted those on to secure them really well. I cemented all the posts to steady everything. I bought a heavy duty tarp hoping that will hold. I put some plastic edging on the plywood inside so they wouldn’t chew on the wood. I have a young boy who loves to chew. Of course they are really afraid of it since I put the tarp on.  It will take time for them to get used to it. If I feed them in there they will eventually come around.  The size is about 9′ x 24′. I thought it was way too big but it seems fine.

CLICK HERE to see photos of her shed
————————————————————–

Installing Alpaca Paddock Fence

Like most ranchers I’m sure we spent our Labor Day weekend hard at work.  With a new cria due any week now it was long past due to put in field fence.  The last thing I’d want is for a healthy cria to be born just to sneak under the fence and into the horse paddock!

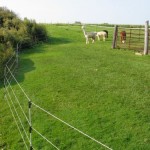
While I worked on taking down the old and installing the new the girls got to enjoy a temporary graze on my “lawn”.   I used, SunGuard II Fiberglass step in posts, Kencove electric twine and a nice wheel winder to make it easier to handle the twine.  Oh, mental note; when using the winding wheels they are fully insulated so if you don’t use all the 800 feet of twine just keep the rest on the wheel, hand the wheel on a nail or something and electrify the fence!  Saves the hassle of cutting your twine just to want it longer the next time you put up a temp paddock. 

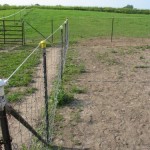
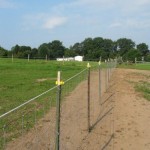
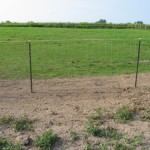
Tractor Supply had a great sale on field fence.   Red Brand Field Fence, some t-post clips, and a few wedge-loc diagonal brace kits and I was ready to go.   We decided to take out the old fence totally, grade out the area to level it off and re pound all the t-posts.  I opted to use t-posts instead of wood because our barn is old and located in a bad spot so some day it’ll have to come down and all the fence will have to be moved again.

I’m very happy with the finished look.  The field fence is 47” high and we topped it off with a strand of hot rope.  This way my nosy horses keep their heads on their side of the fence and feet off of it too.


If any of you moved into an old farm and had to work with what was left over after years of neglect you’ll appreciate the first few photos.  

How to Build an Economical Alpaca Hay Bin

At all the alpaca farms I visited everyone had a different method of feeding their animals hay.  The general consensus was that alpacas (like any other livestock) will make a total mess of hay and instead of eating all of it will make it into a bed, poop or pee on it.  All not good for your hard earned $ that is supposed to be food, not bedding.

I’ve seen folks who just toss out the flakes of hay and let the animals have at it, others who make fancy wooden boxes with cattle panels weighing it down, overhead feeders, and hay nets.

My first year I just threw it on the ground and had a lot of waste so this year I had to think of something else to help save $ on hay.  I really didn’t feel like sawing, nailing, screwing, cutting yadda yadda yadda to make a hay bin, nor did I feel like spending that kind of $$$ to make one either.  My solution had to come from items I had already in the house or barn with minimal out of pocket expense.

The solution? Rubbermaid pink tote hay bins!  Who doesn’t have a ton of Rubbermaid bins hanging around the house?  It turns out 2-3 flakes of hay fit beautifully into these tubs and you can still put the lid on.
COOL! 

Trials:
1. Put hay in bins without lids.  – Resulted in just as much hay waste, the alpacas thought it was a game to dig all the hay out of the bin.  The bin also became a toy and was kicked around.

2. Secure bins to stall wall with screws and washers. – This solved the kicking around the bins but didn’t slow the hay waste down.

3.Cut a hole in bin cover and line the opening with duck tape (hole size ~10”x~12”.  Voila!  – The alpacas can easily get their head in the bin and the lid provided a lip so they couldn’t rake all the hay out of the bin with one mouthful.

Total out of pocket cost?  $0!  I had everything laying around that I needed.  However I’m sure I’m now going to want 2 more bins for something else but at $5 ea. I think I can manage that cost.

I know what you’re thinking, but their heads will get stuck!  Actually, it hasn’t been a problem.  Because the bin is screwed into the wall it’s not moving anywhere and the lids snap on pretty tight.  I guess the worst case scenario would be an alpaca manages to pop the top off while they pull their head out of the bin.  In that case, they will be wearing an interesting necklace until you catch them and take it off.  I’ve been monitoring mine via AlpacaCam and so far no one has even struggled getting their head in or out of the box.  2 alpacas seem pretty comfortable eating out of one box too.

Alpaca Hay Feeder Bin
Alpaca enjoying their new hay bins

Some other cool things about these hay bins.  Easy to load, pop the top off add 2 flakes of hay and snap the top back on.  Should they get really dirty on the inside, 2 screws/washers hold them to the wall.  Unscrew, hose out, dry, and screw back onto the wall.

Transporting Alpacas

When I first got into alpacas I moved them around in my 2 horse bumper pull trailer.  After all I was a horse person first and it’s what I had.  However it became apparent that a different mode of transporting alpacas was needed with the crazy gas prices now days.  Hitching up a 2,000 pound trailer (which is not the most aerodynamic) to haul around a 120lb animal to be bred or to the vet is not economically friendly.

I did a lot of research and asked a lot of questions and answers ranged from mini vans to the Honda Element as possible alpaca haulers.  My thoughts went straight to, OMG I have to buy yet another vehicle? I don’t think so.  Not to mention all of those options have the animal riding in the same space as you and I really don’t feel like smelling alpaca poop, pee, spit for a 4 hour trip to a drive-by-breeding.  Not to mention clean up afterwards.  It’s not like you can take a hose to the back of your commuter vehicle should someone decide to spit on your upholstery.

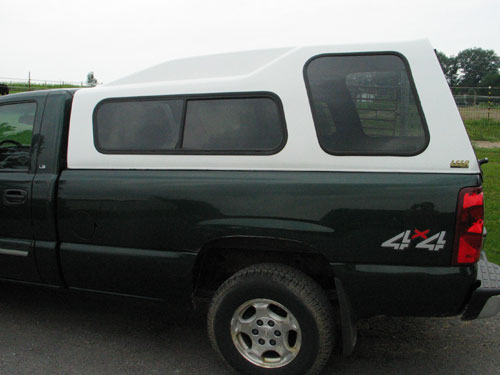
The answer to our alpaca transport needs?  A truck cap!  Folks seemed to shy away from truck caps because A) they had a small s10 pickup B) a full size truck but a short bed C) a low profile truck cap with no headroom.    All which were not issues in our decision.  We have a Chevy Silverado, 8 foot bed and the cap we decided to get was a high profile cap that the alpacas can actually stand up comfortably in.

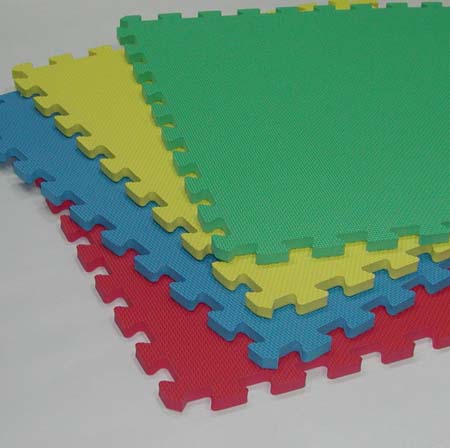
We found our cap on craisgslist for $250 which was a great bargain.  Add another $100 for new locks, sealers, wiring and another $65 for play mats and indoor/outdoor carpeting and voila! We have alpaca transport deluxe without the need to purchase a new vehicle or constantly hitch up our trailer.

The white cap reflects the sun and keeps it cool inside. The play mats make a nice squishy place for them to cush and the indoor/outdoor carpet pulls out very easy for bean cleanup and everything including the bed of the truck can be hosed off for easy clean up.

I can comfortable fit 2 alpacas plus gear or 3 alpacas no gear in the back.  There are 2 large screened windows which give ample air flow while traveling and we’re thinking of installing a 12 volt fan to keep them cool should we get stuck in traffic.

Loading the alpacas turned out to be simpler than anticipated.  By backing the truck up to a hill it puts the tailgate to a height which is easy to step in.  The first few times we had to “assist” the alpacas by picking up their front end and putting their feet on the tailgate and encourage them the rest of the way in with a lead rope.  Usually the 1st one needs some assistance and the others just jump in behind them.  I’m sure given time and training they will load/unload just as easily as they do with the trailer. No hill to back up to?  No problem, 2 people can easily pick up an alpaca and put them into the back of the truck.   To be honest, we haven’t yet had a problem finding a burm of some sort to back up to.

How do the alpacas like it?  They seem to really love it!  Big windows and fresh air.  Most of the time the face backwards and watch the world go by out the big back window.  Other times they sit right in front of the screen and let their hair blow in the breeze.


Our Alpaca Transport


We use these play mats