Fiber Arts Friday – Crochet Rag Rug

Welcome Fiber Arts Friday Folks

Last week I spent a lot of time cleaning the screen porch and getting all the leaves and dirt out of there that blew in through a hole last fall.  What a mess.  After I got the floor cleaned it looked so bare.  It wanted something, a rug.  I still had some old flannel sheets hanging around so I got to work ripping them into strips.

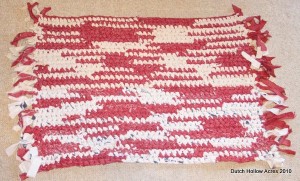
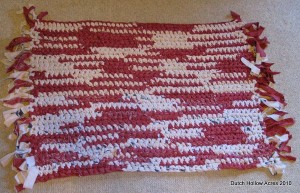
I decided on making a rectangle rug with a random color pattern.  It turns out that was the best choice because I ran out of the beige color!  I ended up replacing it with a more ivory color sheet which at a quick glance you don’t notice but if you look at it hard enough you can see where half the rug has beige and the other half has an ivory look. 

The method I used to connect the strips is exactly the same as the Christmas Rag Rug I made for my brother.  This time I decided not to make the rug the “toothbrush” way but crocheted it instead.  Crochet is faster and makes the rug a bit thicker but doesn’t wear as well as a toothbrush or braided rug.

Directions:

Making Fabric Strips:
For my rug project I decided to repurpose some old flannel sheets.  I cut a little slits along one edge of the sheet every ½ to an  inch or so.  Now comes the fun part!  Grab that little fabric tag and rip!  The flannel sheets tore very evenly right down to the end without the need to cut each strip out by hand.  If you have a cat hanging around this process is very fascinating and you might have to fight for some of your strips back.

How To Connect Fabric Strips:
Now that you have all of these strips hanging around you need to be able to put them together.  Many suggestions have you sewing the strips together, which is great, if you have that kind of time to waste.  Easiest method I found is to cut a small slit in the ends of each strip and slipknot them together.  Thread one strip through the slit you made in the other and then feed the tail of the 1st strip through the slit you made in the end.  Pull tight and voila you have connected the 2 strips together.


Hook Size: S-35
Stitch: Single Crochet
Pattern: SC a chain the length you want the rug +1 SC and turn repeat until the width desired is reached.
Color Pattern: I chose to do a random pattern so I connected the strips as I went.
Fringe: Cut fabric strips into 8″ lengths.  Fold in half and feed the fold through the end and slip the tails through the fold and tighten.

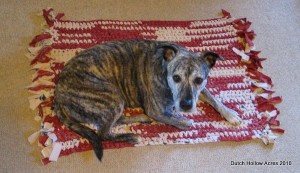
Finished rug size came out to 2ft x 3ft! My dog Brindee has claimed the rug as her own already. *sigh* maybe it’ll end up being a pet rug instead.
Fiber Arts Friday – Country Flannel

Welcome Fiber Arts Friday folks!

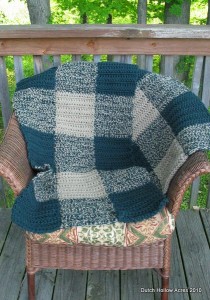
I have been working on a gift for my mom and I’m ½ way through and thought I’d share with you my progress.  I call this one country flannel. 

Mom asked for a warm lap blanket big enough to hide completely under.  When I’m done the dimensions will be 4ft wide by 6ft long which will be plenty big enough I’m sure. It will be really warm too since it’s crochet using 2 strands of yarn so it’s double thick.  I hope she enjoys the flannel pattern and colors; she wanted something that wouldn’t show pet hair too much.   No alpaca in this one, I wanted to be easy to care for and be something she could throw into the washing machine so it’s out of acrylic.

Country Flannel Blanket

Fiber Arts Friday – Alpaca Rug

Welcome back Fiber Arts Friday fans!

For those of you who follow me on Twitter or Facebook you know I’ve been working hard all week on this one and I’m sad to say I wasn’t able to finish it yet. Errrr.  No worries, here’s what I’ve done so far.

At the Northeast Alpaca Expo last weekend I picked up 2.5lbs of cotton core spun alpaca rug yarn.  I was just tickled to find rug yarn around a cotton core instead of jute.  This meant I could easily crochet it without too much of a fight.  Unfortunately any time you involve a ‘S’ size crochet hook there’s always a fight involved.

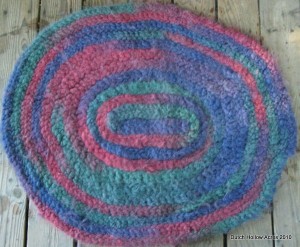
I actually made 2 rugs.  The first one I made a SC rectangle rug and set it out and looked at it for a day and decided I didn’t like it at all so I ripped it apart.  I wanted an oval rug and when I crocheted it the traditional way it was way too thick for my liking and the thickness resulted in a smaller rug size wise.

What I ended up doing was a hybrid between a braided rug and a crochet rug.  I made a huge long single crochet line out of the rug yarn and then sewed it together like a braided rug.  The last step is to felt it which is where I’m at now.

Here is a photo of my very soggy rug.  It is not yet complete and is just in the beginning stages of felting.  I must say, felting a rug is fun; it’s a lot like stomping on grapes.  Just put it in a kiddy pool with warm water, some good tunes and stomp away!

Fiber Arts Friday – Scrap Yarn

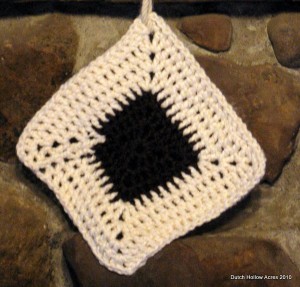
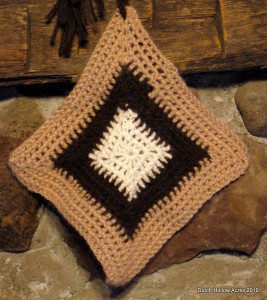
One thing about making cord out of yarn is there is a lot of scrap.  When I get to the end of a skein sometimes a run isn’t long enough to string the 28 feet across my living room so I have all these short bits of yarn.  I brought a bunch to work with me to play with on my breaks and lunch and here is what I came up with.  Boring squares. 

The white/brown square is made out of organic cotton and the tri colored square is made out of alpaca.  I figure I could use them as hot pads or mabe even a wash cloth.  Any other ideas?

Don’t forget to visit Wonder Why Gal for other Fiber Arts Friday Posts.

How To Braid A 6 Strand Rope With A Core

My last Friday Arts Friday post I had many comments on how to braid a lead rope.  So while I worked on my latest one I decided to take a video and so you can see the technique.

The best braids are made out of cord and for beginners the easiest cord to work with is nylon parachute cord.  For the project you are seeing in the video below I’m using 100% baby alpaca cord.  If you’re interested, I can make cord out of your own alpaca yarn, email me for pricing info.  To see or purchase the finished product in this tutorial click here.

When you are braiding round braids you’ll want a core to braid around to help keep the shape of the braid and give it some “meat” in your hands when holding on to it.  Otherwise you’re braiding a tube which will deflate when you hold onto it. It also prevents the finished project from stretching out and gives it strength.  Since the core is not visible it can be of any material you want, I opted to use some scrap acrylic.

Now you have to figure out the length and affix your core around the end snap.  My core is made from 16 feet of chunky acrylic yarn fed through the snap and then twisted into cord to a length of 6.5 feet.  I hate getting to the end of a braid just to find out I don’t have enough cord for the length I want so my rule of thumb to find the length of my strands is to double the length of my core.  So you’re thinking; ok 6 foot leash doubled = (6) 12 foot strands? WRONG!  We want a snap at the end of our leash which means we need (3) 24 foot strands folded in half with the snap in the center. 

I’ve never been able to learn how to braid by reading so instead of describing it, I’ll let the video do the visual babble for me.  If you have any questions feel free to ask away.

[flashvideo file=wp-content/uploads/Video/Braiding.flv /]